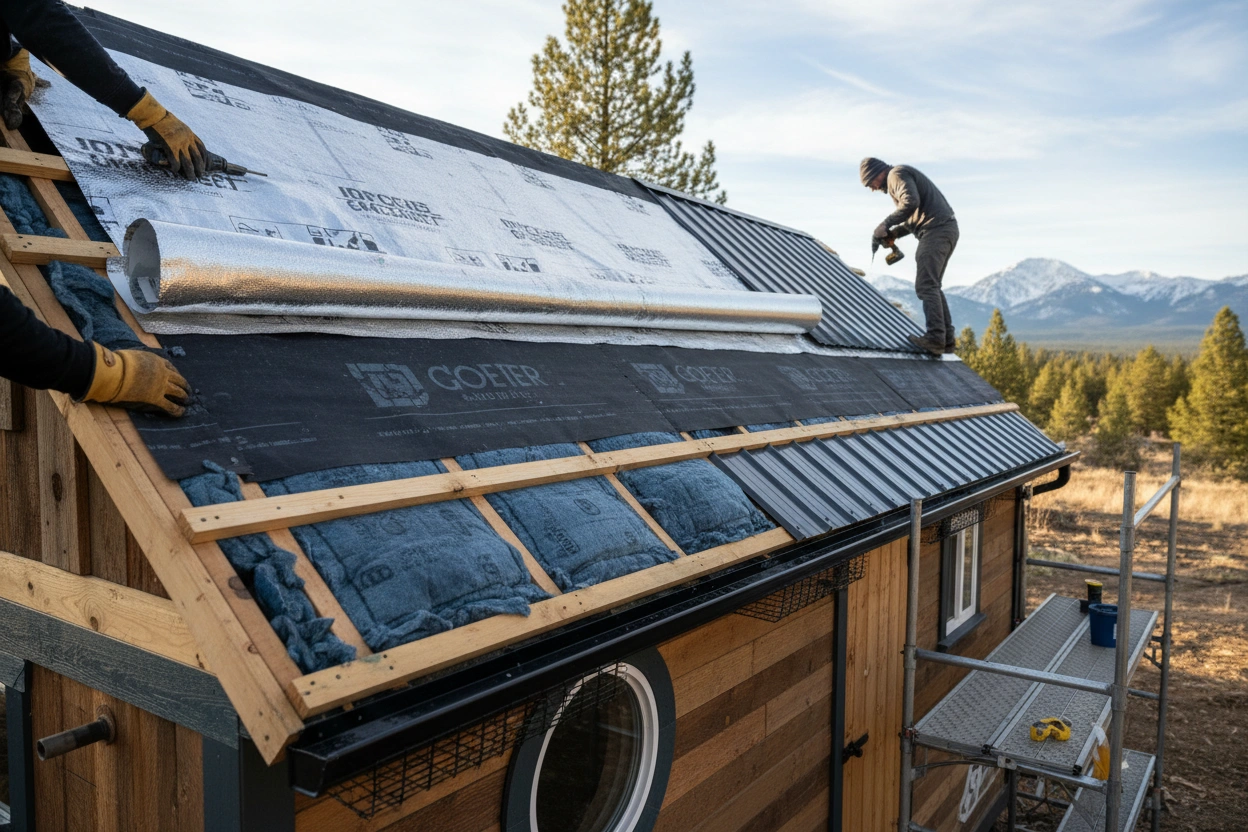
8 Gutter Installation Tips from the Pros

.jpg)
Gutter installation looks deceptively simple. But in reality, it requires careful planning and a precise technique. A single mistake can mean leaks, sagging, or water damage. Professionals avoid these by focusing on the small details that make the system last longer.
Before you start your project, use these practical, expert tips. They’re easy to follow and will save you money, time, and repair headaches in the future.
8 Pro-Backed Tips for Better Gutter Installation
If you’re planning a project or need professional gutter repair in Oak Park, these expert tips will guide you.
1. Measure Everything the Right Way
Want gutters that actually work? Then focus on precise measurements. Forget guessing—the real secret is to measure twice before you make a single cut.
First, measure the entire run of your roofline. We recommend adding a little extra length just in case, clearly marking your spots. Then, double-check everything. This one easy step prevents the main issue homeowners face: off-kilter gutters that spill water down the side of the house.
Get this first step right, and the rest of the project will be smooth.
2. Maintain the Correct Slope
Your gutters need a slope to work. While they look straight, they’re actually tilted just enough to guide water toward the downspout. No slope means standing water, which means rust and clogging.
The professional standard is a quarter-inch drop for every ten feet. It’s the perfect balance for drainage and appearance.
To get it right, mark your high and low points. Use a level to draw a guideline, then install along it. This consistent pitch is what keeps water flowing smoothly out of your gutter and away from your home.
3. Secure the Gutters Firmly
Sagging gutters don’t happen by accident. They’re the direct result of hangers that are spaced too far apart, causing the system to slowly pull away from the fascia. Professional installers prevent this by being precise with their hanger placement.
The standard is to install hangers every two to three feet, and even closer together in regions with heavy rain or snow. This reinforced support is crucial for withstanding severe weather.
For a rock-solid hold, ensure hangers are mounted flush and are secured with high-quality screws, which provide a far superior grip to nails. A firmly attached gutter system won’t flinch under the weight of water. This will also simplify the gutter maintenance in the future.
4. Position the Downspouts Correctly
Never underestimate a downspout. It’s the part of the gutter installation system that decides where the water goes. If it’s misplaced, you’re just dumping water at your own foundation, inviting pooling and cracks.
The rule of thumb is one downspout per 20-30 feet of gutter. But make sure to focus on the direction, too. Always send the water away from your house. You can use an extender if you have to. It’s the simplest way to protect your foundation and your property.
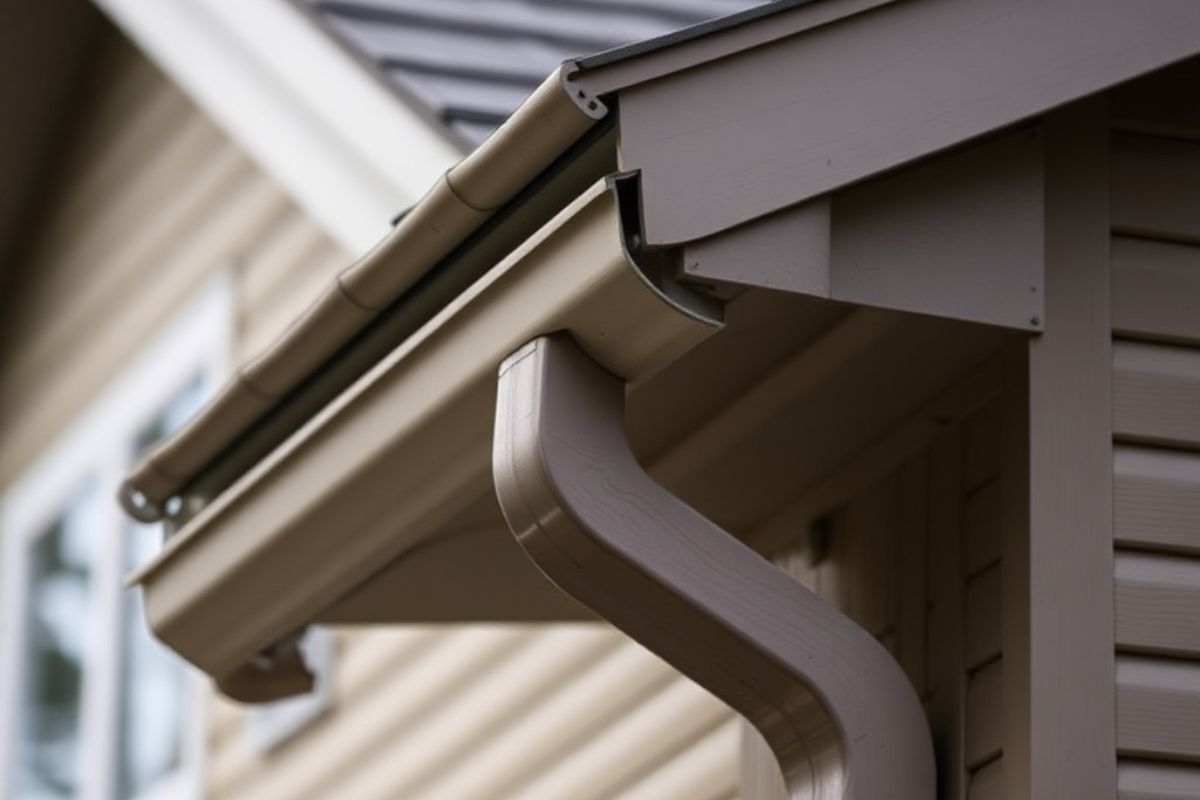
5. Seal the Joints Properly
The weakest points in any gutter system are the seams between sections. A poor seal here is an invitation for leaks that worsen over time and can ruin your exterior walls.
For a strong seal that lasts, always start with a clean surface and use good-quality sealant. Just wipe away any dust or grit. This helps the sealant get a good grip. Tightly sealed joints allow the water to flow smoothly all the way to the downspout.
6. Choose the Right Material
Choosing your gutter material is a balance of climate, cost, and care. Here’s a quick guide to the usual suspects:
- Aluminum: The popular choice. Lightweight and rust-resistant.
- Vinyl: Budget-friendly, but can crack in harsh weather.
- Steel: Tough and strong, but heavy.
- Copper: The luxury option—lasts forever, costs a fortune.
Think about your needs. Heavy rain? Go strong. Want to forget about them? Choose aluminum. Getting the material right up front means better performance and fewer repairs.
7. Keep the System Clear During Installation
Don’t install gutters on a dirty or damaged surface—it’s the most common mistake. Always start with a clean slate. Clear away all leaves, dirt, and old nails from the roofline. A clean surface means a stronger hold.
If the fascia board is weak, fix it first. Gutters hung on a damaged fascia won’t survive a heavy storm. And before you connect the sections, make sure they’re clean inside. A little prep work now prevents major flow problems later. A clean start is a smart start.
8. Test the System After Installation
Never skip the water test! It’s the ultimate check for your gutter’s slope, seams, and drainage. You’ll often spot small leaks or slow spots you’d otherwise miss.
Fix these issues right away—don’t wait for rain to do the testing for you. A quick fix now avoids a big problem later. Watching the flow also shows you exactly where to make tweaks, like adding more slope to a corner or extending a downspout that’s too close to the house.
A final test closes the installation with confidence.
Final Thoughts
Gutter installation is a simple task that demands meticulous care. The reward for that precision is a system that does more than just function. It becomes a long-lasting safeguard for your home’s structure.
The steps themselves are elementary, but their flawless execution is critical. The right installation determines whether your gutters will be a reliable asset or a persistent problem. Master the core principles, and the result will be a system that operates perfectly in all conditions, providing absolute protection for your foundation and walls.