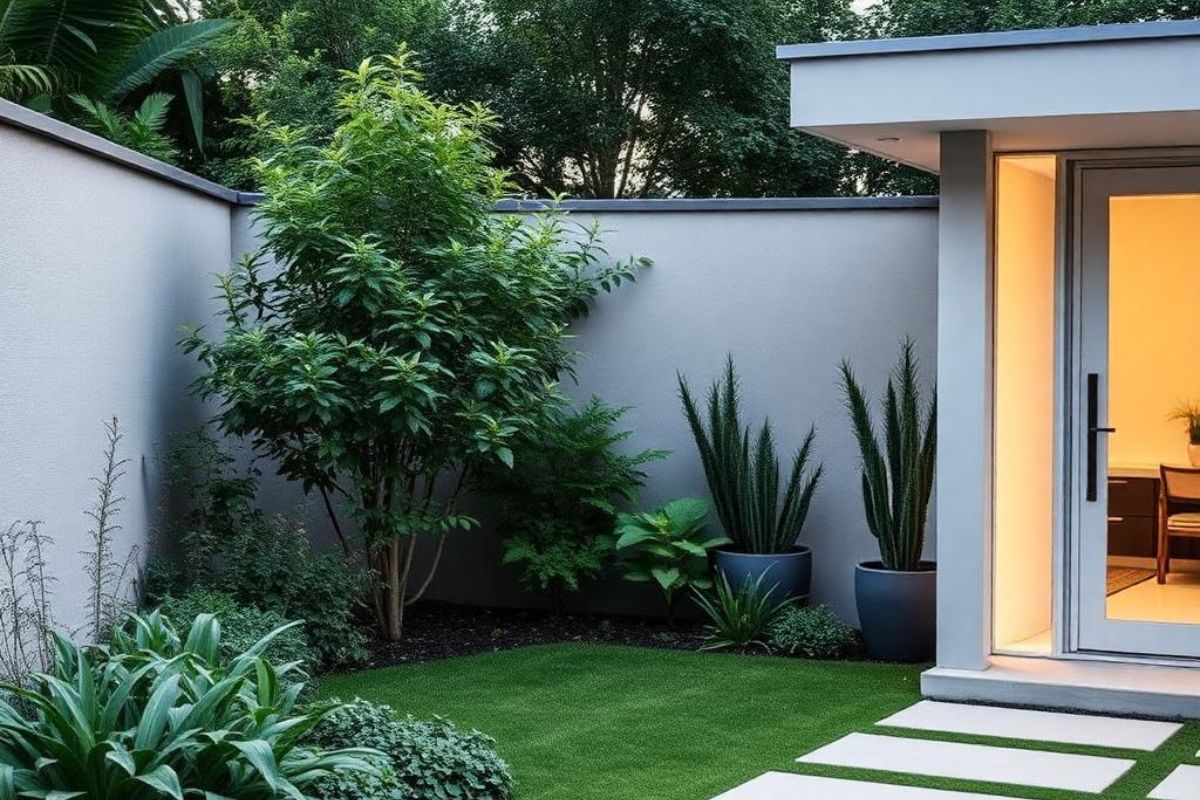
Kitchen Island With Sink: Maximize Functionality and Prep Space

.jpg)
Adding a sink to your kitchen island instantly boosts your workspace, letting you prep, wash, and cook more efficiently. Position the sink centrally for teamwork or offset for extra counter space. Choose a size and style that fits your habits and layout, and plan for proper plumbing. Smart storage—like pull-out trash bins and deep drawers—keeps everything handy. With the right setup, you’ll optimize both flow and functionality, and there’s plenty more to discover for your perfect kitchen design.
- Adding a sink to your kitchen island streamlines meal prep and cleanup by keeping water access at the center of activity.
- Centering or offsetting the sink allows you to balance workspace, traffic flow, and uninterrupted counter areas.
- Choose a sink size and style that fits your cooking habits and complements the island’s design aesthetic.
- Ensure proper plumbing, drainage, and GFCI-protected outlets for safe and hassle-free installation.
- Incorporate smart storage like deep drawers, pull-outs, and bins around the sink to boost organization and efficiency.
Key Benefits of Adding a Sink to Your Kitchen Island
When you add a sink to your kitchen island, you immediately boost both the functionality and flow of your workspace. You’ll cut down on unnecessary steps between counters, making food prep, cooking, and cleanup more efficient. Washing produce, filling pots, or rinsing dishes becomes easier when the sink’s centrally located. This setup also encourages more than one person to work in the kitchen without crowding. You can keep your main counters clutter-free, as the island can handle prep messes and dish stacking. Hosting guests? A sink on the island lets you interact while prepping, keeping the kitchen sociable. Plus, it’s easier to maintain separate zones for food prep and cleaning, which helps with organization and minimizes cross-contamination risks.
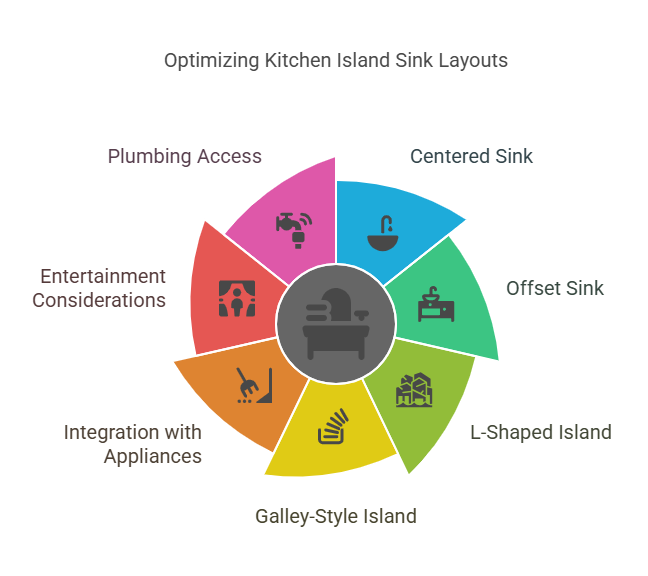
Popular Island Sink Configurations and Layouts
To make the most of your kitchen island sink, choose a layout that matches your cooking habits and space. Start by deciding if you want the sink centered or offset. A centered sink works well for multi-sided prep and traffic flow, while an offset sink creates extra uninterrupted counter space for serving or appliances. Consider an L-shaped island if you need separate zones for prep and dining, or a galley-style island for streamlined movement in open kitchens.
Think about integrating your sink near a dishwasher or trash pull-out for efficient clean-up. If you often entertain, placing the sink at one end leaves the rest of the island open for guests. Don’t forget about plumbing access—position your sink where installation is straightforward to avoid costly complications.
Choosing the Right Sink Size and Style
Because your kitchen island will serve both functional and aesthetic purposes, picking the right sink size and style is key to a successful design. Think about your daily habits—do you prep lots of produce or wash bulky pots? Opt for a large single-bowl sink if you need ample space, or a double-bowl for multitasking. Don’t let an oversized sink dominate your island; balance is essential. For a sleek, modern look, choose an undermount or integrated sink, which streamlines cleanup and maximizes workspace. If you want a classic touch, a farmhouse or apron-front sink adds charm. Match your sink material—stainless steel, fireclay, or composite—to your kitchen’s style and maintenance needs. Select a shape that complements your island’s dimensions and supports your workflow.
Plumbing and Installation Considerations
Although a kitchen island sink adds convenience, it also demands careful planning for plumbing and installation. First, check if your kitchen floor can accommodate new water supply and drainage lines—this often requires accessing the subfloor, so factor in both cost and structural limitations. You’ll need a plumber to guarantee proper venting and compliance with local codes. Consider installing shutoff valves below the sink for easy maintenance and emergencies. Plan the placement of the sink to avoid long pipe runs, which can lead to drainage issues or reduced water pressure. Don’t forget electrical outlets for a garbage disposal or dishwasher, and make sure they’re GFCI-protected. By addressing these factors early, you’ll avoid costly surprises and guarantee your island sink functions smoothly from day one.
.jpg)
Smart Storage Solutions for Island Efficiency
When planning your kitchen island with a sink, maximize efficiency by integrating smart storage solutions that keep essentials within arm’s reach. Install deep drawers for pots, pans, and mixing bowls below the countertop. Add pull-out shelves or trays to make accessing cleaning supplies and dish soap easy. Consider built-in trash and recycling bins near the sink to streamline cleanup. Use narrow pull-outs for storing cutting boards, baking sheets, or spices vertically. Install utensil organizers in shallow drawers, so everything from spatulas to knives is organized and ready. Don’t forget about toe-kick drawers for seldom-used items. With these practical storage options, you’ll keep your island clutter-free and functional, so meal prep and cleanup stay efficient and your kitchen remains organized.
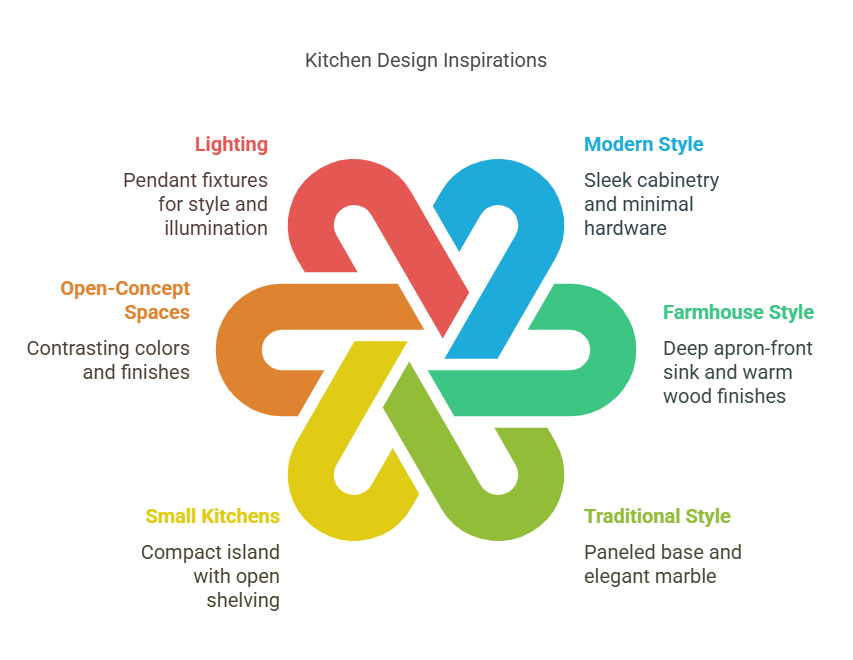
Design Inspirations for Every Kitchen Style
No matter your kitchen’s aesthetic, you can design an island with a sink that complements your space and enhances daily routines. For a modern look, choose sleek cabinetry, minimal hardware, and an integrated sink in quartz or stainless steel. Love farmhouse style? Opt for a deep apron-front sink, warm wood finishes, and classic paneling. If you prefer a traditional vibe, select a paneled island base, elegant marble or granite, and a polished undermount sink.
For small kitchens, consider a compact island with a single-bowl sink and open shelving to keep things airy. In open-concept spaces, use contrasting colors or finishes to create a focal point. Don’t forget about lighting—pendant fixtures above the island add both style and practical task illumination.
Tips for Maintaining Your Island Sink and Countertop
To keep your island sink and countertop looking their best, wipe up spills right away to prevent stains and water marks. Use a soft cloth and mild soap for daily cleaning—harsh chemicals can dull or damage many surfaces. For stainless steel sinks, dry them after use to avoid water spots and buff with a microfiber cloth for extra shine. If you have a stone countertop, seal it regularly to block moisture and prevent etching. Avoid placing hot pots directly on the counter; always use trivets or mats. Clean around the faucet and seams to stop buildup and mold. Don’t let food scraps sit in the sink; rinse and clear the drain daily. With these simple habits, you’ll keep everything spotless and in great shape.
Conclusion
Adding a sink to your kitchen island transforms it into a true multitasking hub. You’ll boost prep efficiency, streamline cleanup, and free up counter space elsewhere. Choose a sink style that fits your needs, plan your plumbing carefully, and maximize storage to keep essentials close at hand. With the right layout and maintenance, your island can become the centerpiece of a stylish, highly functional kitchen. Don’t just dream—start planning your ideal island sink setup today!


.webp)