
Winter Decluttering Guide: How to Organize Your Home for the Season

When winter hits, you don’t have time to hunt for gloves or clear space on every counter. Start where clutter builds fastest: the entryway and kitchen. Set a 15-minute timer, sort items into keep, store, donate, and toss, and put a simple landing zone in place for boots and bags. Then move to coats, gear, and décor—but the order you follow matters if you want it to stick…
- Declutter high-traffic zones in 15-minute bursts; remove everything, wipe surfaces, and return only daily-use items.
- Organize the entryway with boot trays, labeled cubbies, and one hook per person for coats and bags.
- Sort winter coats and gear into keep, repair, donate, recycle; keep only what fits and gets worn weekly.
- Consolidate fall and holiday décor, discard broken items, then store by category in labeled lidded bins with heavier bins on bottom.
- Maintain simple zones—Daily Use, Weekly Use, Away—and do a five-minute nightly reset plus one-in-one-out for accessories.
Start Your Winter Decluttering in High-Traffic Zones
When you start winter decluttering, begin in the high-traffic zones you use every day—your entryway, kitchen counters, living room surfaces, and hallway drop spots. Set a 15-minute timer and grab a trash bag, a donate box, and a “relocate” bin. Clear surfaces first: remove everything, wipe down, then return only daily-use items. In the kitchen, empty one counter section, then open nearby kitchen cabinets, and toss expired food, duplicate tools, and chipped mugs. Group what stays by task: coffee, prep, snacks. In the living room, corral remotes, chargers, and papers into one tray, and limit décor to a few pieces. Finish by walking the relocate bin to each room immediately.
Organize Your Entryway for Boots, Hats, and Gloves
After you’ve cleared the high-traffic surfaces, lock in that progress by setting up an entryway system that stops boots, hats, and gloves from migrating through the house. Start with boot storage: place a waterproof tray or shallow bin by the door, then add a slim rack or stackable cubbies beside it for dry pairs. Label spaces by person so items don’t pile up.
Next, install hat racks or a rail with hooks at shoulder height; assign one hook per person and keep extras in a small lidded box on the shelf above. Add a narrow basket for gloves under the hooks, with dividers if you share it. Finish with a 30-second reset: empty pockets, return items, and wipe the tray nightly.

Declutter Winter Coats and Cold-Weather Gear
Although bulky coats and winter gear feel “seasonal,” they can quietly take over closets if you don’t set limits. Pull every coat, scarf, snow pant, and base layer into one pile so you can see volume and duplicates. Try each item on, then sort into four bins: keep, repair, donate, recycle. Keep only what fits, matches your current climate, and gets worn weekly.
Handle coat donation immediately: remove items with broken zippers or heavy stains unless you’ll fix them today. For the keep pile, do quick gear maintenance—wash according to labels, reproof waterproof shells, replace missing toggles, and pair gloves and liners. Assign one hook or shelf per person, and stop when it’s full.
Store Fall Items and Holiday Décor Safely
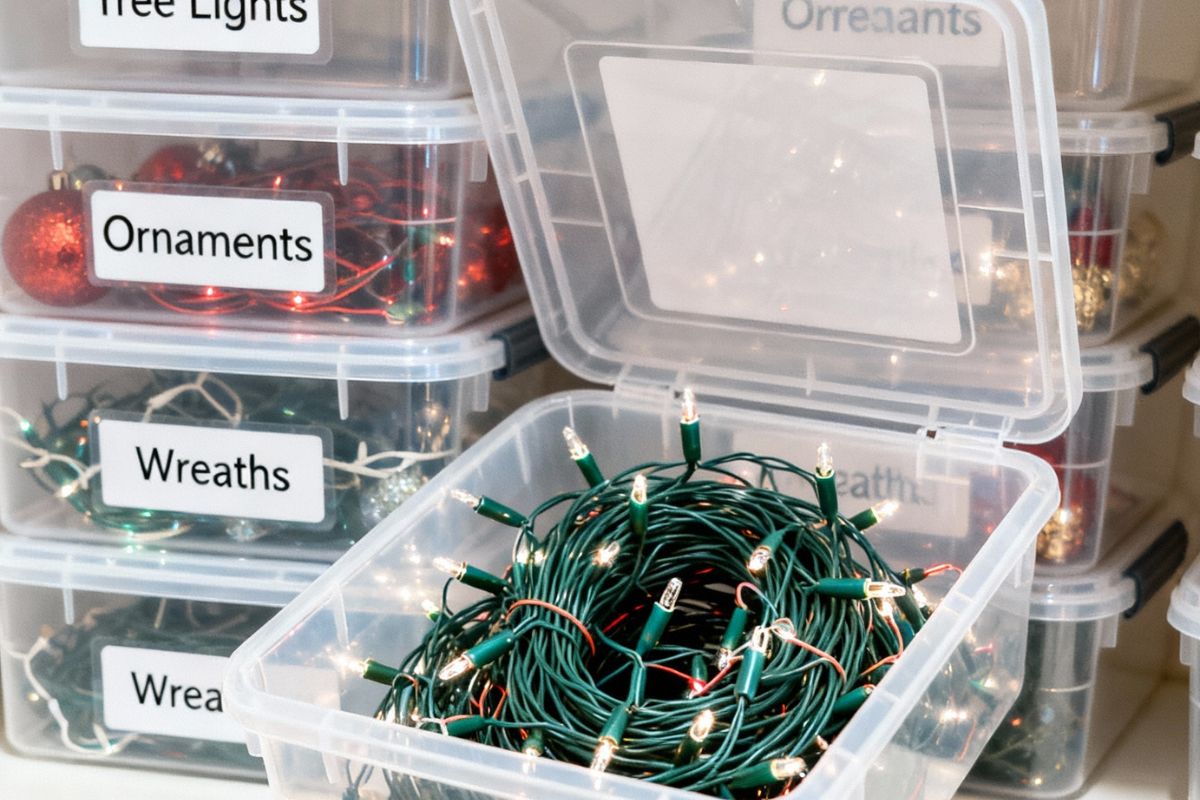
Cold-weather gear stays accessible, so next you’ll tackle the stuff that doesn’t: fall items and holiday décor that can get crushed, mildewed, or lost if you stash it loosely. Gather everything in one spot, then sort by holiday and item type (lights, ornaments, linens, candles). Toss broken pieces and recycle tangled light strands you won’t fix.
Choose sturdy, lidded bins for seasonal storage; add silica packets for fragile paper, and wrap glass in tissue or dividers. Label two ways: big-print outside labels plus an index card inside listing contents. Coil lights around cardboard, tape ends, and store them in zip bags. Keep scented items sealed so they don’t perfume everything. Stack heavier bins on the bottom and use one bin for “favorites” to speed decorative organization next year.
Keep Winter Decluttering Easy With Simple Systems
Think of a simple system as your winter decluttering autopilot: set up a few repeatable rules so you don’t have to “decide” every time you tidy. Start with a minimalist mindset: keep only what you’ll use this season, and park the rest in seasonal storage. Create three zones: Daily Use (by the door), Weekly Use (a nearby bin), and Away (labeled totes).
Use the one-in, one-out rule for gloves, hats, and scarves. Run a five-minute reset each night: return items to their zone, empty pockets, and toss trash. Keep a donation bag in a closet and schedule a monthly drop-off. Finally, label shelves and bins so everything has a home and you’ll stay consistent all winter.
Conclusion
You’ve set your home up for an easier winter by clearing high-traffic zones first. Keep your entryway working with a quick daily reset: corral boots, hang coats, and return hats and gloves to one bin. Re-check cold-weather gear weekly and donate what you don’t wear. Pack fall items and holiday décor in labeled, stackable bins so you can grab what you need fast. Stick to these simple systems, and clutter won’t creep back in.


.jpg)
.jpg)