Winter Garage Prep Guide for a Weather-Ready Space


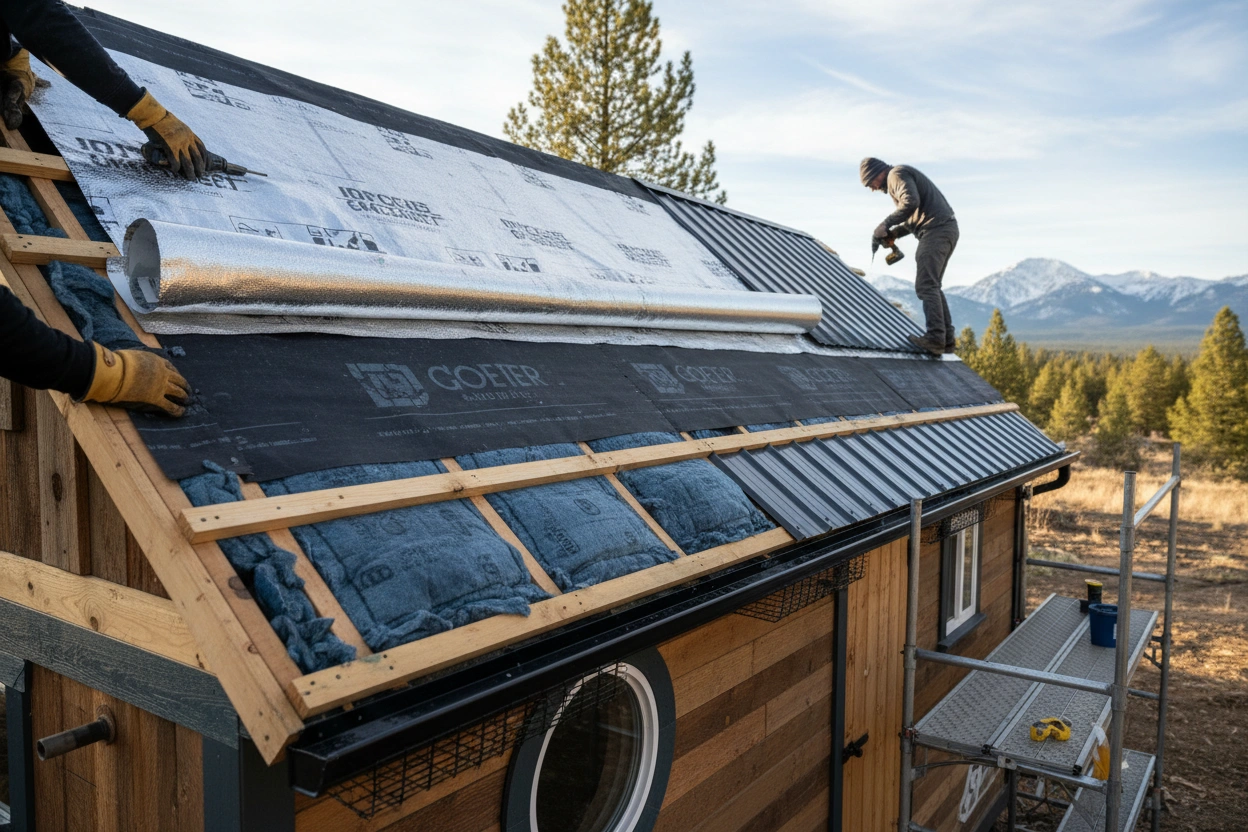
Winterize your garage by sealing drafts at doors, windows, and penetrations; add weatherstripping, caulk, foam, and attic/rim-joist insulation. Control moisture with a hygrometer, cross-ventilation, and a dehumidifier on continuous drain. Protect floors: clean, etch, and seal concrete; add epoxy, containment mats, runners, and keep a squeegee handy. Organize zones, wall rails, ceiling racks, and clear bins. Create a warm work zone with safe heat, mats, and cord management. Maintain lighting, door hardware, and sweeps—then sharpen the details.
- Seal drafts at doors, windows, sill plates, and penetrations; add weatherstripping, door sweeps, and caulk or foam to close gaps.
- Insulate garage door panels, attic, and rim joists; cover exposed walls with faced batts to retain heat.
- Control humidity to 40–50% with ventilation and a properly sized dehumidifier; maintain filters and log hygrometer readings.
- Protect floors by cleaning, sealing, and coating concrete; use containment mats, non-slip runners, and promptly remove salt and slush.
- Optimize storage with wall rails, ceiling racks, clear labeled bins, and 36-inch aisles; create a safe, heated work zone with proper power management.
Seal Drafts and Insulate Key Areas
Even before the temperature drops, pinpoint and seal the gaps that leak heat.
Walk the perimeter with a flashlight and feel for drafts along doors, windows, sill plates, and conduit penetrations. Mark trouble spots.
Install new vinyl or rubber weatherstripping on the garage door and side entry; adjust the door sweep so it lightly kisses the floor.
Caulk stationary joints with exterior-grade silicone; use expanding foam for larger voids around pipes and outlets.
Insulate key areas next.
Add rigid foam to the garage door panels, securing with clips. Blow in cellulose or lay fiberglass batts in the attic above, ensuring proper R-value for your climate.
Insulate rim joists with cut-and-fit foam sealed with spray foam. Cover exposed walls with faced batts, then tape seams.
Tackle Moisture With Smart Ventilation and Dehumidifying
While cold air creeps in, moisture is the bigger enemy—prevent rust, mold, and warped materials by managing humidity from the start.
Start with data: place a hygrometer at mid-height, away from doors. Aim for 40–50% relative humidity. If readings spike after storms or snowmelt, act.
Improve airflow first. Clear clutter from wall perimeters, crack the door briefly after parking, and run an exhaust fan for 15–30 minutes to purge damp air.
Add passive vents high and low to promote cross-ventilation without major heat loss.
Deploy a dehumidifier sized to your square footage. Choose a unit with a continuous drain to a floor drain or condensate pump, and set auto-restart.
Elevate it for better intake. Empty and sanitize filters monthly. Store hygrometer logs; adjust runtime seasonally.
Protect Floors From Salt, Slush, and Stains

Before winter storms hit, harden your garage floor against the mess. Sweep, degrease, and etch the concrete so sealers bond. Patch cracks.
Apply a penetrating silane/siloxane sealer for salt resistance, then top with a polyurethane or epoxy coating for abrasion protection. Let each coat cure per label.
Add containment where wheels drip. Use heavy-duty containment mats with raised edges under vehicles; empty and rinse them weekly.
Place ribbed, non-slip runners along walk paths to catch slush. Put absorbent pads at door thresholds and around the water heater.
Manage entry points. Install stiff-bristle boot scrapers and water-trapping door mats.
Keep a rubber squeegee and a plastic shovel to move slush to the drain. Rinse salt promptly; neutralize with a mild vinegar solution.
If you’re storing multiple vehicles or considering an upgrade, planning ahead like you would when shopping for used cars Calgary can help you organize your garage efficiently and ensure proper winter protection for each ride.
Optimize Storage for Winter Gear and Bulky Equipment
Because winter clutters a garage fast, start by zoning and elevating everything. Assign wall sections: daily-use gear, sports, tools, and auto supplies.
Install heavy-duty wall panels or rails with hooks for shovels, ice scrapers, and extension cords. Use ceiling racks for totes of holiday décor and camping gear; keep weight within manufacturer limits. Mount ball racks and vertical ski/snowboard holders.
Add a fold-down shelf near the door for quick-access items like melt, gloves, and flashlight.
Containerize by frequency. Clear, labeled bins for hats, mittens, and gaiters; breathable bags for helmets; vented crates for wet boots.
Corral gas cans and snowblower parts on a low, spill-proof tray. Park the snowblower nose-out; hang the spare shear pins beside it.
Keep aisles 36 inches wide and ladders secured.
Create a Safe, Warm Work Zone
Even as temps drop, you can carve out a workspace that’s safe, lit, and heated without wasting energy. Seal gaps around doors and walls with weatherstripping and foam to cut drafts.
Lay interlocking rubber tiles or anti-fatigue mats for insulation and traction. Keep cords off the floor with retractable reels and mount surge-protected power strips at bench height. Place a fire extinguisher and first-aid kit within arm’s reach.
Choose a heater sized to your square footage—electric infrared or sealed-combustion gas for safer fumes. Add a thermostat or plug-in controller to prevent overheating.
Position the heater to avoid flammables and maintain clear airflow. Use a small fan to circulate warmth evenly. Store chemicals in vented cabinets, label containers, and keep absorbent granules ready for spills.
Upgrade Lighting for Cold-Weather Clarity
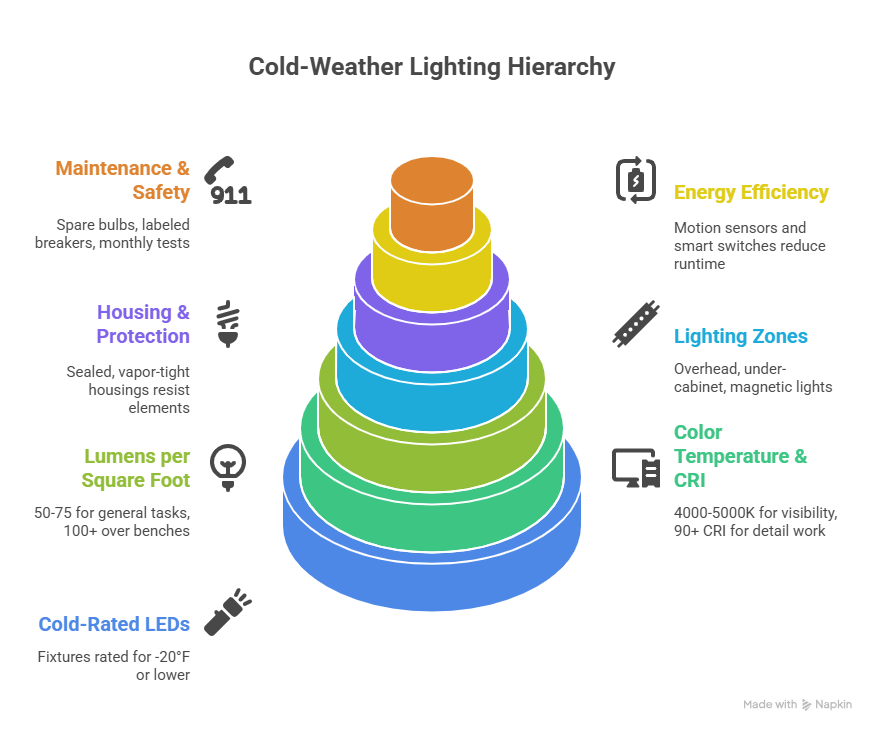
With heat and safety set, focus on light that stays bright when the mercury drops.
Swap old fluorescents for LED fixtures rated for cold starts; look for “-20°F” or lower on the spec sheet. Choose 4000–5000K color temperature for crisp visibility and 90+ CRI if you do detail work. Target 50–75 lumens per square foot for general tasks; add 100+ lumens per square foot over benches.
Map zones: overhead for coverage, under-cabinet for benches, magnetic or clip-on lights for engines and wheel wells. Use sealed, vapor-tight housings to resist dust and moisture.
Install motion sensors or smart switches to cut idle runtime. Protect circuits with GFCI where required. Keep spare LED tubes or bulbs on hand, label breakers, and test lighting monthly.
Maintain Doors, Weatherstripping, and Hardware
Before deep freezes and slush arrive, inspect every garage door panel, seal, and hinge so cold weather doesn’t trap you or spike heating loss. Look for cracks, rot, or warping. Tighten loose hinges and brackets. Lubricate rollers, hinges, and springs with a silicone or lithium spray—avoid grease that stiffens in cold.
Test the door balance by disconnecting the opener; it should stay halfway without drifting.
Check bottom sweep, side, and top weatherstripping. If light shows through, replace it. Cut new stripping to length, clean surfaces, and press or nail it firmly. Adjust the bottom seal retainer so it compresses evenly on the floor.
Verify opener force and travel limits. Test auto-reverse with a 2x4 under the door.
Finally, clear tracks and wipe sensors.
Conclusion
You’ve tightened up drafts, managed moisture, and shielded floors, so your garage is ready for winter. Keep gear organized, tools accessible, and pathways clear. Set up a warm, safe work zone with reliable lighting, and check doors, weatherstripping, and hardware regularly. Stay on top of dehumidifying and ventilation to prevent rust and mildew. With a few habits—quick sweeps, weekly checks, and seasonal tune-ups—you’ll protect your space, your equipment, and your time all winter long.