Tuff Shed Tiny House (5 Conversion Ideas with Pictures)


Tuff Shed, one of the leading companies in storage buildings and garages, has a shed that can be customized and built for a fraction of the cost of an average home.
The charm and appeal of tiny homes have grown to many people. More and more are yearning to be more financially accessible, environment-friendly, and mobile. That’s why you’ll see many tiny homes getting built today in your community and across the whole country.
Have you always wanted to live tiny but feared that smaller wasn't necessarily better? Tiny houses come in many shapes and sizes. You can build your small dwelling out of an already made structure, such as a trailer, or you can have it custom-built to your specifications.
You can add them to your existing home, like your property’s second floor. If you want to see it for yourself, you may visit this website.
However, did you know you can make your home out of a Tuff Shed tiny house?
Moving into a small home is a great way to downsize your life and possessions while living more minimally. You can free yourself from the hefty debt purchasing a larger home will get you and be able to do the things you enjoy in life easily.
Read on to learn more about how to turn their product into the Tuff Shed tiny house of your dreams.
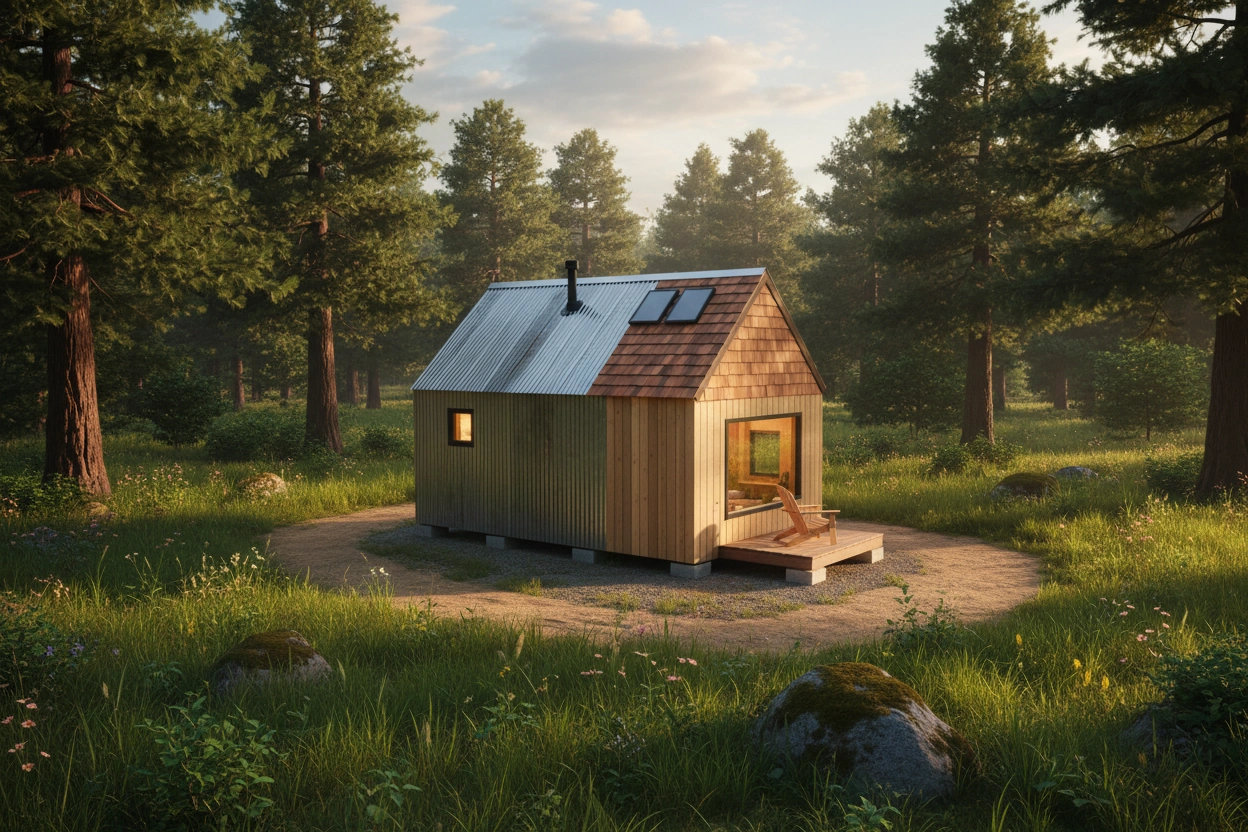
Making a Tuff Shed tiny house
Who knew that a shed bought at Home Depot could be repurposed into a cozy home? Tiny houses have gained popularity over the past several years, with more people wanting fewer material possessions and less debt. If you can have a cute house on wheels, why wouldn't you?
Tuff Shed makes several models that will work for your miniature needs, but the Sundance TR-1600 model is one of the most popular. Starting at a base price of just $13,000, these sheds can be fully customized to your specifications.
This Tuff Shed home can have not just one but two stories! A front porch can be added so you can curl up with a cup of tea on a chilly morning or entertain guests outside. You can also add window shutters and boxes to plant colorful flowers in the spring.
The beautiful thing about this shed is that you can do anything with it. But before you begin, it’s best to sketch the layout and design, so you’ll have a guide that you can use as a reference.
Factor in the sleeping arrangements, kitchen, bathroom, and living area. Search for multi-functional pieces of furniture online to make the most out of your space. If you’re considering sustainability, choose proper insulation, use energy-efficient appliances, and install solar panels so you won’t have to rely on the grid.
Are you afraid you'll be stuck with the usual gray or tan you see with a shed? Fear not! Tuff Shed comes in over 30 colors, such as Tundra Frost, Ground Coffee, or Pumpkin Patch. You can select roofing from several options for material and color as well. In storm-prone regions, many owners also keep tiny home roof repair services on call for inspections after heavy hail or wind. Every shed has a warranty to protect you from wind and rain, ensuring you're in safe hands.
Turning a shed into a tiny house is also reasonably straightforward. Before you begin, you must take some precautions and set up a few utilities. Here are the steps to take.
Create a level pad and a drainage grate
It is recommended to strip the grass and lay down 4-6 inches of 34" gravel before the shed's delivery. Make the gravel base extend 1-2 feet beyond the shed’s footprint in all directions and check that the space is entirely level. You can do this by using a plate compactor.
To avoid queries from the inspector, you can bury your water and sewer lines, thus concealing the ends. Consider installing French drains if any slopes cause water to flow in a specific direction around the shed.
Connect utilities
The next step should be connecting utilities to the shed once delivered. Bring your connections from wherever they are to the shed and inside once the inspector has departed.
If you pre-buried your connections, you would have to locate and connect the connecting points. Additionally, test everything before closing the doors and windows.
This job can be very complex, and relying on professionals will ensure every connection is placed safely, correctly, and securely.
Take care of the moisture in the shed's base
It is recommended to build your shed on blocks just high enough for you to crawl under. To seal the wood from moisture, apply a thick coat of outdoor deck oil-based paint to the underside of the shed.
Moisture might be your worst enemy when building a shed. Most sheds are lined with OSB or related products that cannot keep the moisture out. Therefore, it's essential to use quality materials like Plywood.
Access and air movement are vital for keeping your floor dry and rot-free. Moisture can accumulate, and pests can eat into the underside of the floor where it meets the ground.
Adjust the framing of your shed
After dealing with moisture, the next step is to adjust the framing of your shed. Shed builders frequently use frames that are smaller than standard 2x4s. If at all feasible, have your shed built using 2x4s so that all of your building materials work.
As all building components are made to match a 2x4 wall, the subsequent few phases may require you to come up with alternatives if your walls aren't formed of 2x4s. A 1x3 wall, like found in some sheds, will result in an exceedingly cold home. Therefore you'll need better insulation.
Attach electrical, HAVC, and water lines
The next step is to install any required HVAC systems, electrical and water lines, internet connections, and so on, including safety devices such as smoke detectors to prevent issues like fire alarm beeping caused by low batteries or improper wiring. You can also consider installing outlets and lighting to the shed's exterior.
Due to the limited area, it's critical to have outlets close to where you need them. When putting outlets, think about the gadgets you'll be plugging in. Furthermore, if any wall runs are longer than 5 feet and do not have an outlet, install one right away.
Outlets cost $1.50 for a box and $2 for the actual receptacle; they are inexpensive, so don't skimp on this.
Fill in every single gap
To make your tiny house airtight, try to fill in any gaps you might find in the walls or flooring. It is recommended to use a high-quality silicone caulk. In addition, you can also spray foam in any unreachable areas.
Insects and bugs can quickly enter through gaps in floors and walls if they are not sealed. Aside from that, lighting and rainwater can enter via these openings, which can be detrimental to your sheds. Seal from the exterior first, then from the inside.
You should also caulk the joints where the walls meet the floor and the corners and inside the framing where the studs meet the sheathing. Many people would think this is overkill, but a shed is so small that it will take several hours to seal it completely.
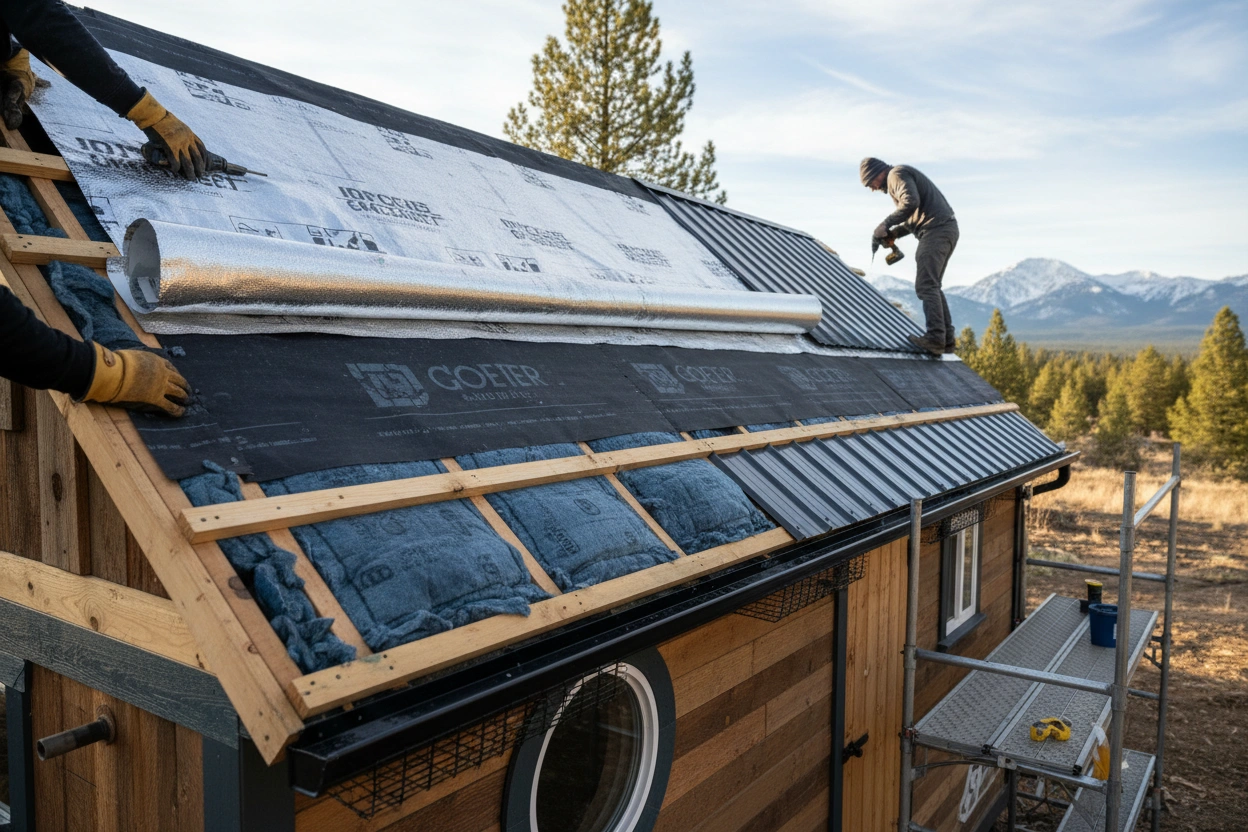
Get ceilings and walls insulated
Spray foam, and batt insulation are your two primary insulation options. Batt insulation is a reliable, low-cost, and easy-to-install option. A spray foam material with closed cells is also a good choice for insulation. Closed-cell spray foam acts as an excellent air and vapor barrier.
You can acquire batts that are precisely the right size for your wall cavities to minimize the amount of cutting required. Alternatively, Spray foam, which also has a very high R-value, can keep your home warmer or colder for longer with the same amount of wall thickness.
8. Insulate the floors of the shed
In the absence of insulation, your shed floor is likely to condense and become cold. This can be easily averted by adding insulation beneath the shed's floor or by layering new plywood on top of foam board already on the floor.
You can also choose to do both. Place an order for a shed with a taller wall, spray closed cell foam on the underside, and then, using the correct adhesives, lay down 2 inches of polyiso foam and a thick plywood subfloor on top of that.
Foam on the sides has two disadvantages: it restricts overhead height, so choose a taller wall option for your shed, and it looks weird beside your front door where it transitions, so you'll have to figure it out. Both issues are fixable, and heated flooring can also be a great addition.
Final touches
After completing all the preceding tasks, it's time to add the finishing touches. You can install cabinets, countertops, and other finishes at this stage. Use the store’s widely available, premade goods to make it easier and more affordable.
There are great options for this at Ikea or your local big box store. Bring in your appliances, put lighting on the roughed-in boxes, and so on. And there you have it. You've successfully converted a shed into a small house.
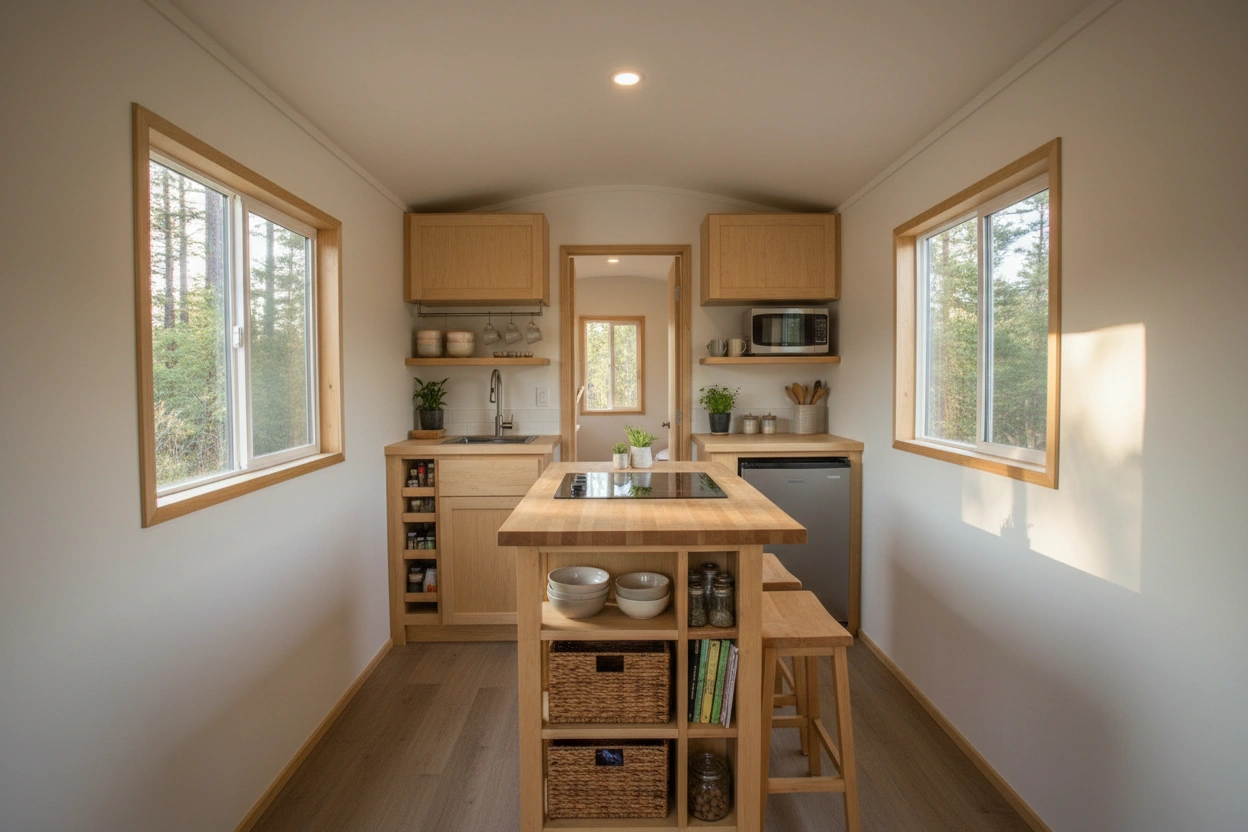
How to master a minimalistic layout
Now that you've decided to make your tiny home out of a shed, it's time to figure out how you want your floor plan to flow. Your Tuff Shed house is custom-built to your specifications, inside and out. Choose how you want your layout to be: open-concept living and dining space on the main floor with a bathroom and bedroom upstairs. It's all up to you.
Once you've sorted the layout, let's figure out how to squeeze all the stuff you have in your current home into 800 square feet. Didn't ever think you would live your life as a minimalist? Unfortunately, if you want to live in a tiny home, you're going to have to get rid of a lot of stuff.
It’s best that you keep things simple. This means choosing furniture with clean lines and a few decorative elements. Take a step back and evaluate what you’ve accomplished. By doing this, you’ll often see things that may no longer fit in your new home and lifestyle.
Choose what belongings are most important to you and have that be your guideline when beginning to purge. A lot of what you have may just simply be trash and are things that aren't useful anymore, so weed those out first. Focus on the areas that scare you the most and get those taken care of. You'll boost confidence by tackling the problematic parts of your house.
5 Tuff Shed conversion ideas
Once you've got the nuts and bolts figured out, it's time to move on to the fun part - decorating. That's not just limited to wall paint color and flooring. Figuring out how to make your home function efficiently while also having it be your style is a balance. Here are some Tuff shed conversion ideas that you can use.
1. Implement Dual-Purpose designing
Items in your home that will need to serve dual purposes. You would need to make the most of the room as there isn't much of it. Starting with a bed is often a good option because it can be a pull-out or hidden in another room of the house.

In addition to having numerous advantages, the shed could serve as a guest sleeping area with the addition of a pull-out couch.
2. Pay attention to lighting.
Use lighting and mir way to make your small space appear more prominent. Large mirrors will reflect the light around the room, maximizing your space. And better yet, you can use them to see how fabulous you look in your tiny home.

This is especially crucial when it comes to natural light. Because windows in tiny homes are often smaller, use natural light wherever possible.
3. Focus on the visual appeal
Use a statement piece like a rug or bold lighting fixture to tie the room together. Everything in your home should provide a specific function as you don't want to waste space, but that doesn't mean it can't be gorgeous and visually appealing.

Having a lot of small items scattered around your living space may be your style, but it can tend to make your tiny house look cluttered.
4. Be smart with storage
Storage is essential in tiny homes because there isn't as much space as in a larger home. As a result, you must make innovative use of every available storage space.
If your home has a second story, consider hollowing out the stairway and using it as a bookcase. As a result, it functions as both a set of steps and the main point of the bottom chamber, which has vast storage space.

Consider incorporating these into the house's design, so you know where they are, but they don't detract from the overall aesthetic value of the home.
5. Utilize the walls
Selecting a color palette with light or neutral colors for your walls and floors will help the space appear brighter. Having your statement piece be bolder in color will draw your eye across the room, making it look bigger.

You can also use the walls to solve the spacing problem by building several shelves. You can also hang artwork to improve the room's aesthetic look.
There are limitless options when designing your Tuff Shed tiny home, so what are you waiting for?
Let's make your little dreams happen
While the thought of making a tiny home out of a shed might seem unconventional, choosing a Tuff Shed may be the right fit for you. Not only do you have many stylistic options, but your custom home can be had for a fraction of the cost of a traditional home.
When constructing a tiny house, there are several things to consider, such as connecting utilities, adjusting the framing, and getting the whole area insulated. Filling in Gaps is also an essential part of the procedure.
If you're looking to make the jump into a Tuff Shed tiny house, you don't have to do it alone. Many companies can assist you in the process of figuring out what steps to take in your small (but significant) journey.
So, what are you waiting for? Contact Tiny house today at https://www.tinyhouse.com/, and let’s get started on building your new Tuff Shed tiny home!