
How to Finish a Basement Step by Step

To finish your basement step by step, start by evaluating the space, noting dimensions, features, and any moisture issues. Next, set a budget that includes all potential expenses and a buffer for surprises. Plan your layout, considering structural elements and intended use, then obtain any necessary permits from your local building department. Insulate and waterproof to protect against moisture, and follow with framing, drywall, and ceiling installation. Finally, select flooring and furnish your new space. As you tackle each stage, you'll discover essential tips that can make the process smoother and more efficient.
- Assess your basement's space to determine potential uses, dimensions, and existing features while addressing any moisture issues.
- Set a comprehensive budget that includes all expenses and a buffer for unexpected costs, prioritizing essential features.
- Plan the layout by measuring the space, noting structural elements, and sketching a functional design for furniture placement.
- Obtain necessary permits from your local building department for any electrical, plumbing, or structural modifications required.
- Insulate and waterproof the basement using sealants, vapor barriers, and proper insulation materials to prevent moisture and mold growth.
Assess Your Basement Space
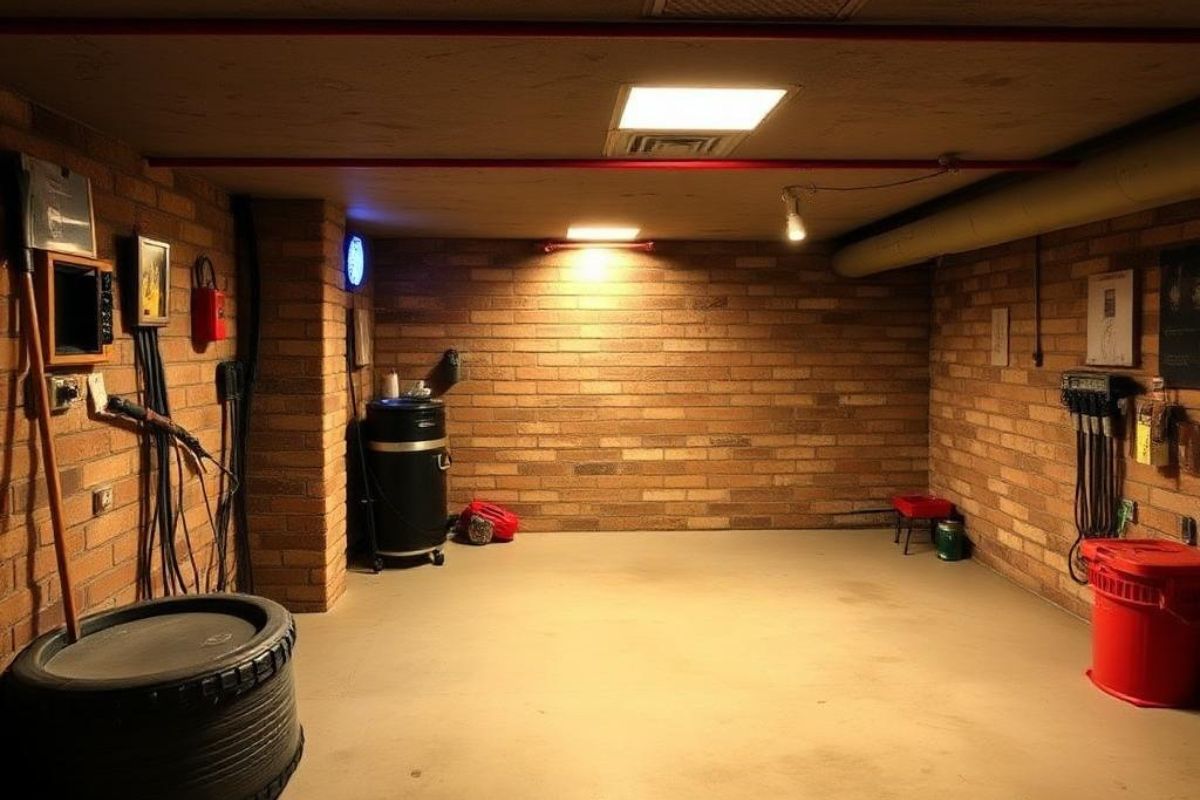
When you step into your basement, take a moment to visualize its potential. Look around and assess the space's dimensions, layout, and any existing features. Identify support beams, windows, and plumbing locations, as these elements will influence your design choices. Consider the ceiling height; a higher ceiling can create an open feel, while a lower ceiling might require creative solutions.
Check for moisture issues, as water damage can hinder your plans. Make note of any areas needing repair or insulation. Think about how you envision using the space—whether it's a cozy living area, a home office, or a playroom for the kids. This assessment phase is vital in mapping out your future basement transformation.
Set a Budget
Before diving into your basement project, it's crucial to set a realistic budget that aligns with your vision. Start by identifying all potential expenses, including materials, labor, permits, and unexpected costs. It's wise to add a 10-15% buffer for surprises. Research prices for flooring, drywall, and fixtures to get a clear idea of what you'll need.
Consider whether you'll hire professionals or tackle some tasks yourself, as this can greatly impact your budget. Additionally, prioritize your wishes: determine what's essential versus nice-to-have. This approach helps you stay focused and avoid overspending. By establishing a solid budget, you'll set the foundation for a successful basement transformation that fits both your needs and your wallet.
Plan the Layout
With your budget in place, it's time to turn your attention to planning the layout of your basement. Start by measuring the space and noting any structural elements like support beams or pipes. Think about how you want to use the area—whether it's for a family room, home office, or guest suite. Sketch a rough layout, considering the placement of furniture, light sources, and pathways for easy movement.
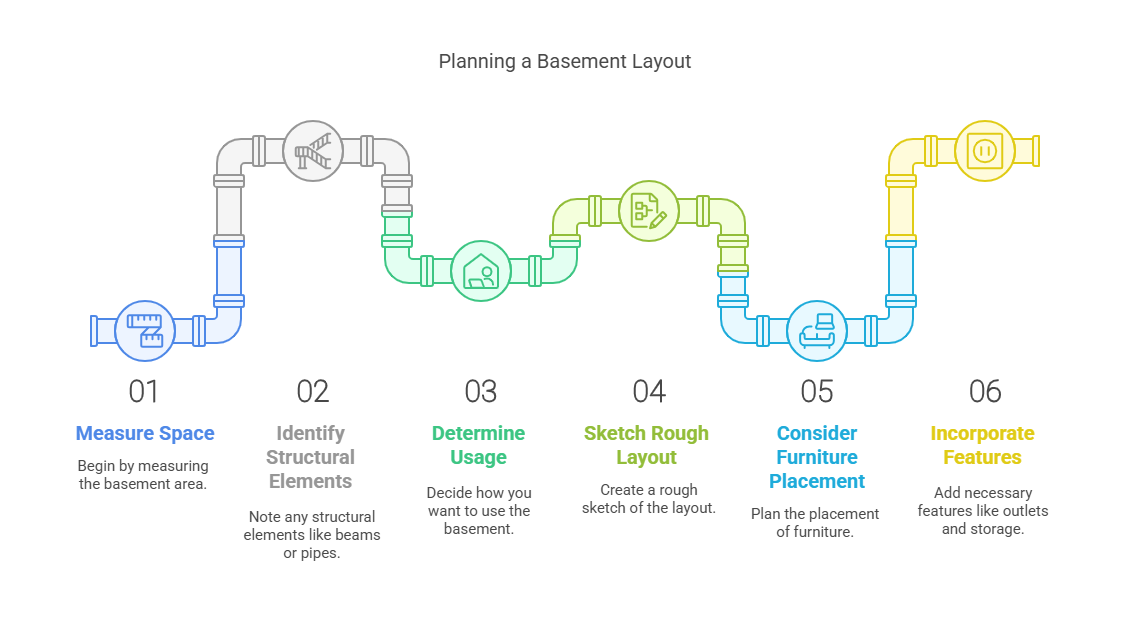
Don't forget to incorporate necessary features like electrical outlets and storage solutions. Prioritize functional zones while ensuring a good flow throughout the space. Finally, visualize your design to make necessary adjustments before finalizing your plan. This thoughtful layout will set the stage for a welcoming, practical basement you'll love.
Obtain Necessary Permits
While planning your basement project, obtaining the necessary permits is essential to confirm compliance with local building codes and regulations. Start by checking with your local building department to understand what permits you need. Common permits include electrical, plumbing, and structural modifications.
Gather all required documents, like your project plans, and submit them as instructed. Be prepared for potential inspections during the process; this guarantees your work meets safety standards.
It's also wise to consult with a professional if you're unsure about local requirements. Remember, skipping this step can lead to fines or delays, so invest the time upfront to secure your permits. This will not only protect your investment but also provide peace of mind throughout your project.
Insulate and Waterproof
Once you've secured all necessary permits, the next step is to insulate and waterproof your basement. Start by inspecting your walls and floors for any signs of moisture or damage. Use a high-quality waterproofing sealant on the walls, focusing on cracks and joints. Next, consider applying a vapor barrier to the walls and floor, which helps prevent moisture from seeping in.
For insulation, opt for rigid foam board or fiberglass batts, ensuring you cover all exterior walls. This not only keeps your basement warm but also improves energy efficiency. Remember to leave space for air circulation to avoid mold growth. By taking these steps, you'll create a dry, comfortable environment for your finished basement, ready for the next phase of your project.
Install Electrical and Plumbing
Installing electrical and plumbing systems is a crucial step in finishing your basement, and it's important to plan carefully. Start by determining your needs—think about outlets, lighting, and any plumbing fixtures like sinks or bathrooms. Consider hiring a licensed electrician and plumber to guarantee safety and compliance with local codes.
Before installation, map out the locations of electrical boxes and plumbing lines. Use conduit for electrical wiring to protect it and keep it organized. For plumbing, run pipes along the ceiling or walls, making sure to maintain proper slopes for drainage.
Finally, test everything before closing up walls, confirming that your systems function correctly. This groundwork will set you up for a successful and enjoyable finished basement.
.jpeg)
Frame the Walls
As you prepare to frame the walls of your finished basement, it's essential to confirm that your layout aligns with your design plans. Start by measuring and marking where each wall will go using a chalk line or a measuring tape. Use pressure-treated lumber for the bottom plate to protect against moisture. Cut your studs to fit between the top and bottom plates, ensuring they're spaced 16 inches apart for stability.
Secure the bottom plate to the floor using anchors, then lift the studs into place and nail them to the top plate. Don't forget to add any necessary blocking for shelves or fixtures. Finally, double-check your work for plumb and level before moving on to the next stage of your project.
Add Drywall and Ceilings
After you've framed the walls, adding drywall and ceilings is the next essential step in finishing your basement. Start by measuring your wall sections and cutting the drywall to fit. Use a utility knife for clean edges, and remember to leave a slight gap at the floor to prevent moisture issues. Secure the drywall to the studs with screws, placing them about 16 inches apart.
Next, move on to the ceiling. If you're using drywall, attach it in the same manner, ensuring the edges are staggered for added strength. For a quicker solution, consider drop ceilings, which allow easy access to utilities above. Finish by taping and mudding the seams, sanding them smooth. Once dry, you're ready to paint!
Choose Flooring Options
With the walls and ceilings now complete, it's time to focus on flooring options that will enhance your basement's functionality and aesthetics. Start by considering moisture-resistant materials, as basements can be prone to dampness. Vinyl plank flooring is a popular choice due to its durability and easy maintenance. If you prefer warmth, carpet tiles offer comfort and can be replaced individually if damaged. For a modern look, polished concrete is sleek and resistant to moisture. Don't forget about area rugs for added warmth and style.
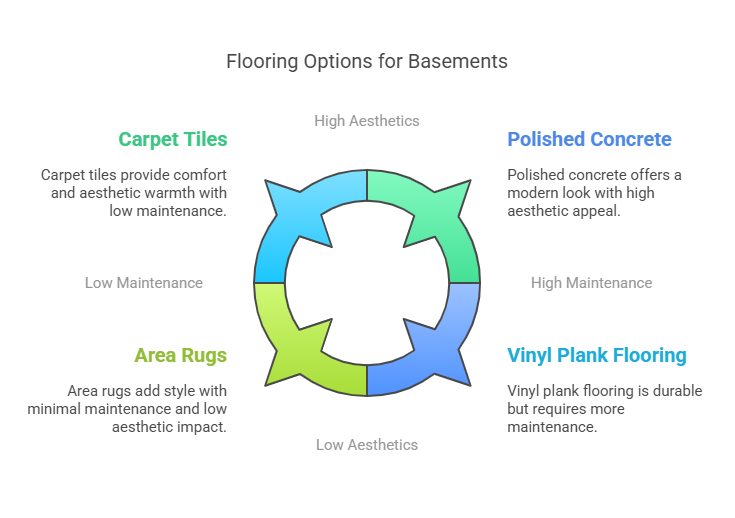
Finally, make certain any flooring you choose has a proper underlayment to prevent moisture issues and improve insulation. Take your time to weigh your options and select a flooring type that suits your lifestyle and design preferences.
Decorate and Furnish
While you may have focused on the structural elements of your basement, decorating and furnishing it can truly transform the space into a welcoming environment. Start by choosing a color palette that complements your home's overall style. Soft, warm tones can create a cozy atmosphere, while brighter shades can energize the room. Next, select furniture that fits the function of your basement—consider a comfy sofa for a lounge area or a sturdy table for a game space.
Add personal touches with artwork, throw pillows, and rugs to enhance comfort. Don't forget about lighting; a mix of overhead and task lighting can brighten up darker corners. Finally, incorporate storage solutions to keep the area organized and clutter-free.
Conclusion
Finishing your basement can transform an underutilized space into a functional and inviting area. By following these steps—from evaluating your space to adding those final decorative touches—you'll create a space that meets your needs and reflects your style. Remember to stay organized and stick to your budget, and don't hesitate to seek professional help if needed. With a little effort and creativity, you'll be enjoying your new basement in no time!


.jpg)
.jpg)