How to Replace a Deck Railing: A Step-by-Step Guide to Fixing Your Deck’s Railing

If your deck railing is worn, damaged, or simply outdated, it's time to consider replacing your deck railing.
Not only does this improve the appearance of your deck, but it also ensures safety and stability.
Whether you’re tackling this project yourself or hiring a professional, understanding how to replace a deck railing can help you make the right decisions.
In this guide, we’ll show you the process of replacing deck railing step-by-step and give you tips on how to fix deck railing issues along the way.
Why You Should Replace or Fix Your Deck Railing
Deck railings not only enhance your deck's aesthetics but also serve as a safety feature. Over time, deck railings can deteriorate due to weather exposure, wood rot, or general wear and tear.
If your deck railing is loose, damaged, or simply not up to code, it’s crucial to take action before further damage or accidents occur.
Replacing a deck railing can also increase your home’s value, making it a great investment.
Tools You’ll Need to Replace a Deck Railing
Before you begin deck railing installation, gather these basic tools:
- Screwdriver or impact driver
- Nail puller or pliers
- Circular saw or handsaw
- Measuring tape
- Level
- Wood glue (optional)
- Pilot drill bits
Make sure to wear protective gear like gloves, safety glasses, and ear protection to stay safe during the installation process.
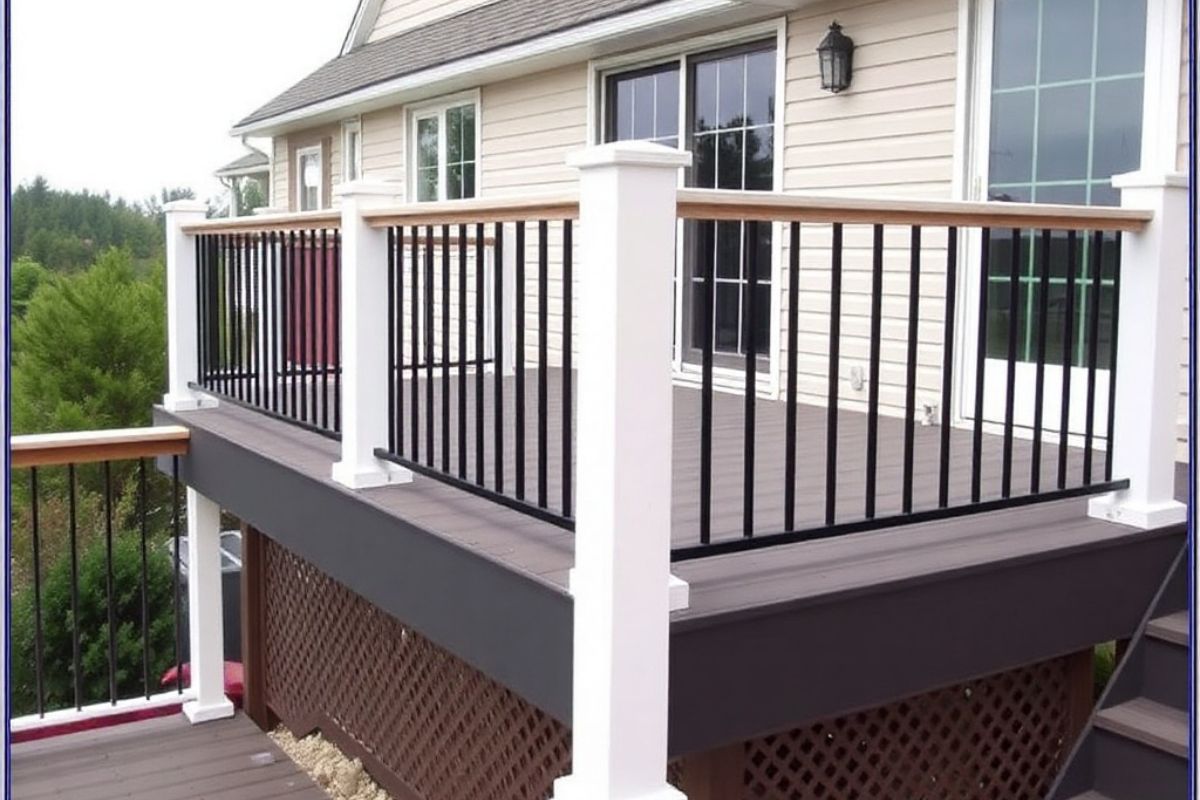
How to Replace a Deck Railing
.png)
Step 1: Remove the Old Railing
Start by removing the old railing carefully. If you can, take measurements of the existing railing before removal. This can serve as a template for the new one, especially if the angles or notches are complex. Use a nail puller or impact driver to remove the nails or screws holding the railing in place. If possible, remove the railing in one piece to make measurements easier for the new installation.
Step 2: Measure and Cut the New Rail
Measure the space between the posts, and cut the new deck railing accordingly. If the original railing is intact, use it as a guide. If not, measure the distance between the posts to determine the correct length. For longer pieces, consider using 45-degree angled cuts at the joints to ensure a smooth and seamless transition between pieces.
Step 3: Install the New Rail
Position the new rail against the posts, aligning it with the marks you made earlier. Drill pilot holes to prevent splitting when securing the rail. Use screws or nails to attach the railing, ensuring that it is level and properly secured. Attach the ends of the railing to the posts with screws to ensure a firm hold.
Step 4: Attach the Rail Cap
Once the rail is in place, it’s time to install the rail cap. This step helps provide a finished look and extra stability. Position the rail cap so it sits flush with the railing, and secure it with screws driven every 12 inches along the length of the cap.
Step 5: Check for Stability
After the new railing and cap are installed, test the stability of the railing by applying pressure to the structure. Ensure there are no loose spots or movement. If needed, add extra screws or fasteners to strengthen weak areas.
How to Fix Deck Railing Issues
If your deck railing isn’t completely damaged but requires minor repairs, here’s how to fix deck railing issues:
- Loose Posts: If the posts are wobbly, tighten or replace the screws holding them in place. You may need to add extra bracing if the posts have started to rot.
- Cracked or Warped Wood: If the wood is cracked or warped, replace only the damaged sections, and ensure the new wood matches the existing deck.
- Rusty or Loose Hardware: Replace any rusty screws or nails, especially if your deck is near saltwater or high humidity. Use stainless steel or galvanized screws to prevent future corrosion.
Deck Railing Installation: When to Call a Professional
.png)
While replacing deck railing can be a manageable DIY project, it’s essential to know when to call in a professional for deck railing installation.
If you’re not confident in your ability to safely install the railing or if the deck’s structure is compromised, hiring a professional will ensure that the job is done correctly.
A licensed contractor can also help if your deck has unique design features or if you need to adhere to local codes for safety.
Conclusion
Replacing a deck railing can enhance both the safety and appearance of your outdoor space.
Whether you choose to do it yourself or hire a professional for deck railing installation, it’s important to ensure that the new railing is secure and properly installed.
Following the steps outlined above will help you replace your railing efficiently and safely, ensuring your deck remains a reliable and inviting area for years to come.


.jpg)