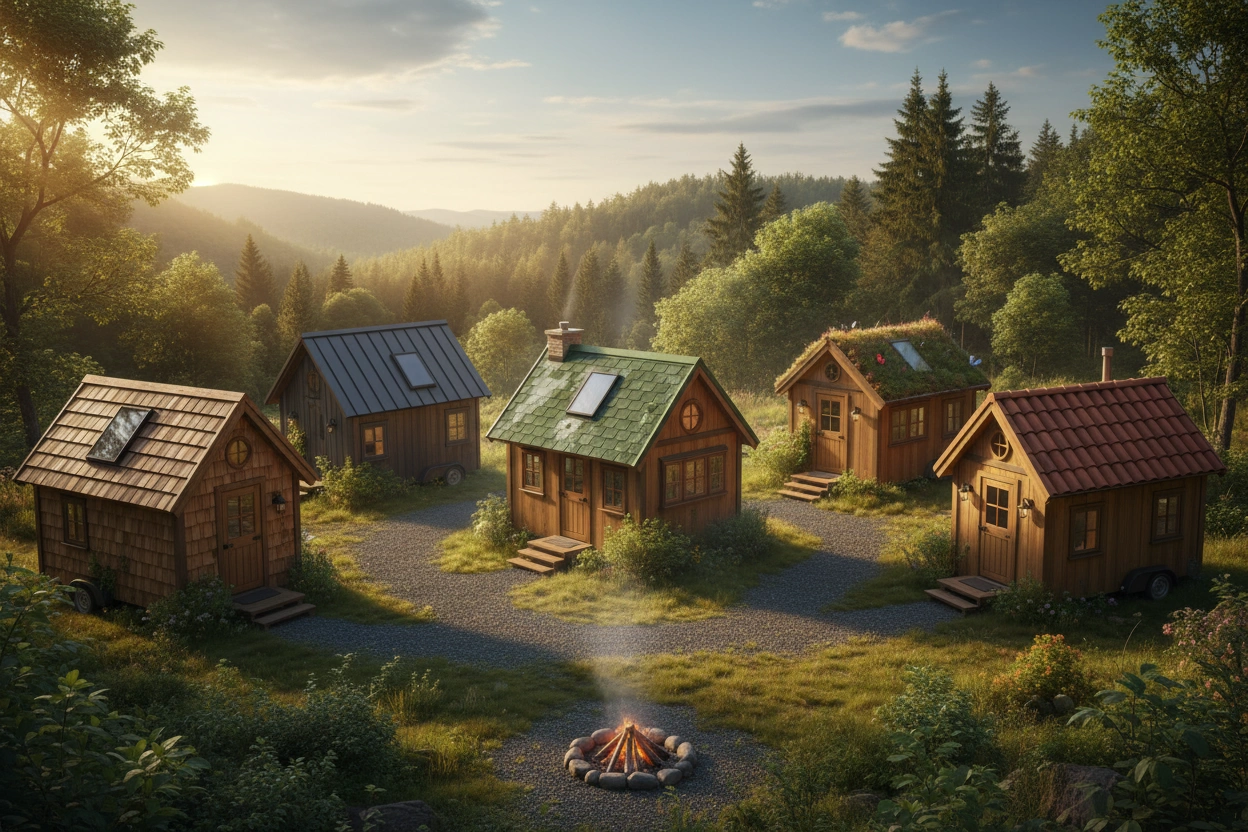
The Smartest Thing You Can Do Before Building a Tiny Home

.jpg)
Designing a tiny house is one of the most exciting challenges in modern living — but it's also one of the most unforgiving. Every square foot counts. A misplaced wall, a poorly positioned window, or an awkward kitchen layout can turn your dream home into a cramped nightmare. That's why more and more tiny house builders and future owners are turning to 3D visualization before a single nail is hammered.
The Problem With "Winging It"
Traditional blueprints are great for contractors, but for most people they're hard to read and even harder to emotionally connect with. You can stare at a 2D floor plan for hours and still not truly understand how the space will feel when you're standing inside it.
Tiny homes amplify this problem. With layouts often under 400 square feet, the difference between a functional flow and a claustrophobic box comes down to inches. Getting it wrong means costly revisions, wasted materials, and a lot of frustration.
What 3D Rendering Actually Shows You
Working with a professional 3D rendering company gives you a photorealistic preview of your tiny home — inside and out — before construction begins. This isn't just a pretty picture. It's a decision-making tool that lets you:
- See how natural light moves through the space at different times of day
- Test material combinations — wood finishes, metal accents, window frames — without committing to anything
- Evaluate spatial flow between your kitchen, sleeping loft, and living area
- Spot design problems early, when fixing them costs nothing
For tiny homes in particular, 3D renders reveal whether a lofted sleeping area will feel cozy or suffocating, whether your fold-down dining table will actually have enough clearance, and whether your chosen color palette will make the space feel open or heavy.
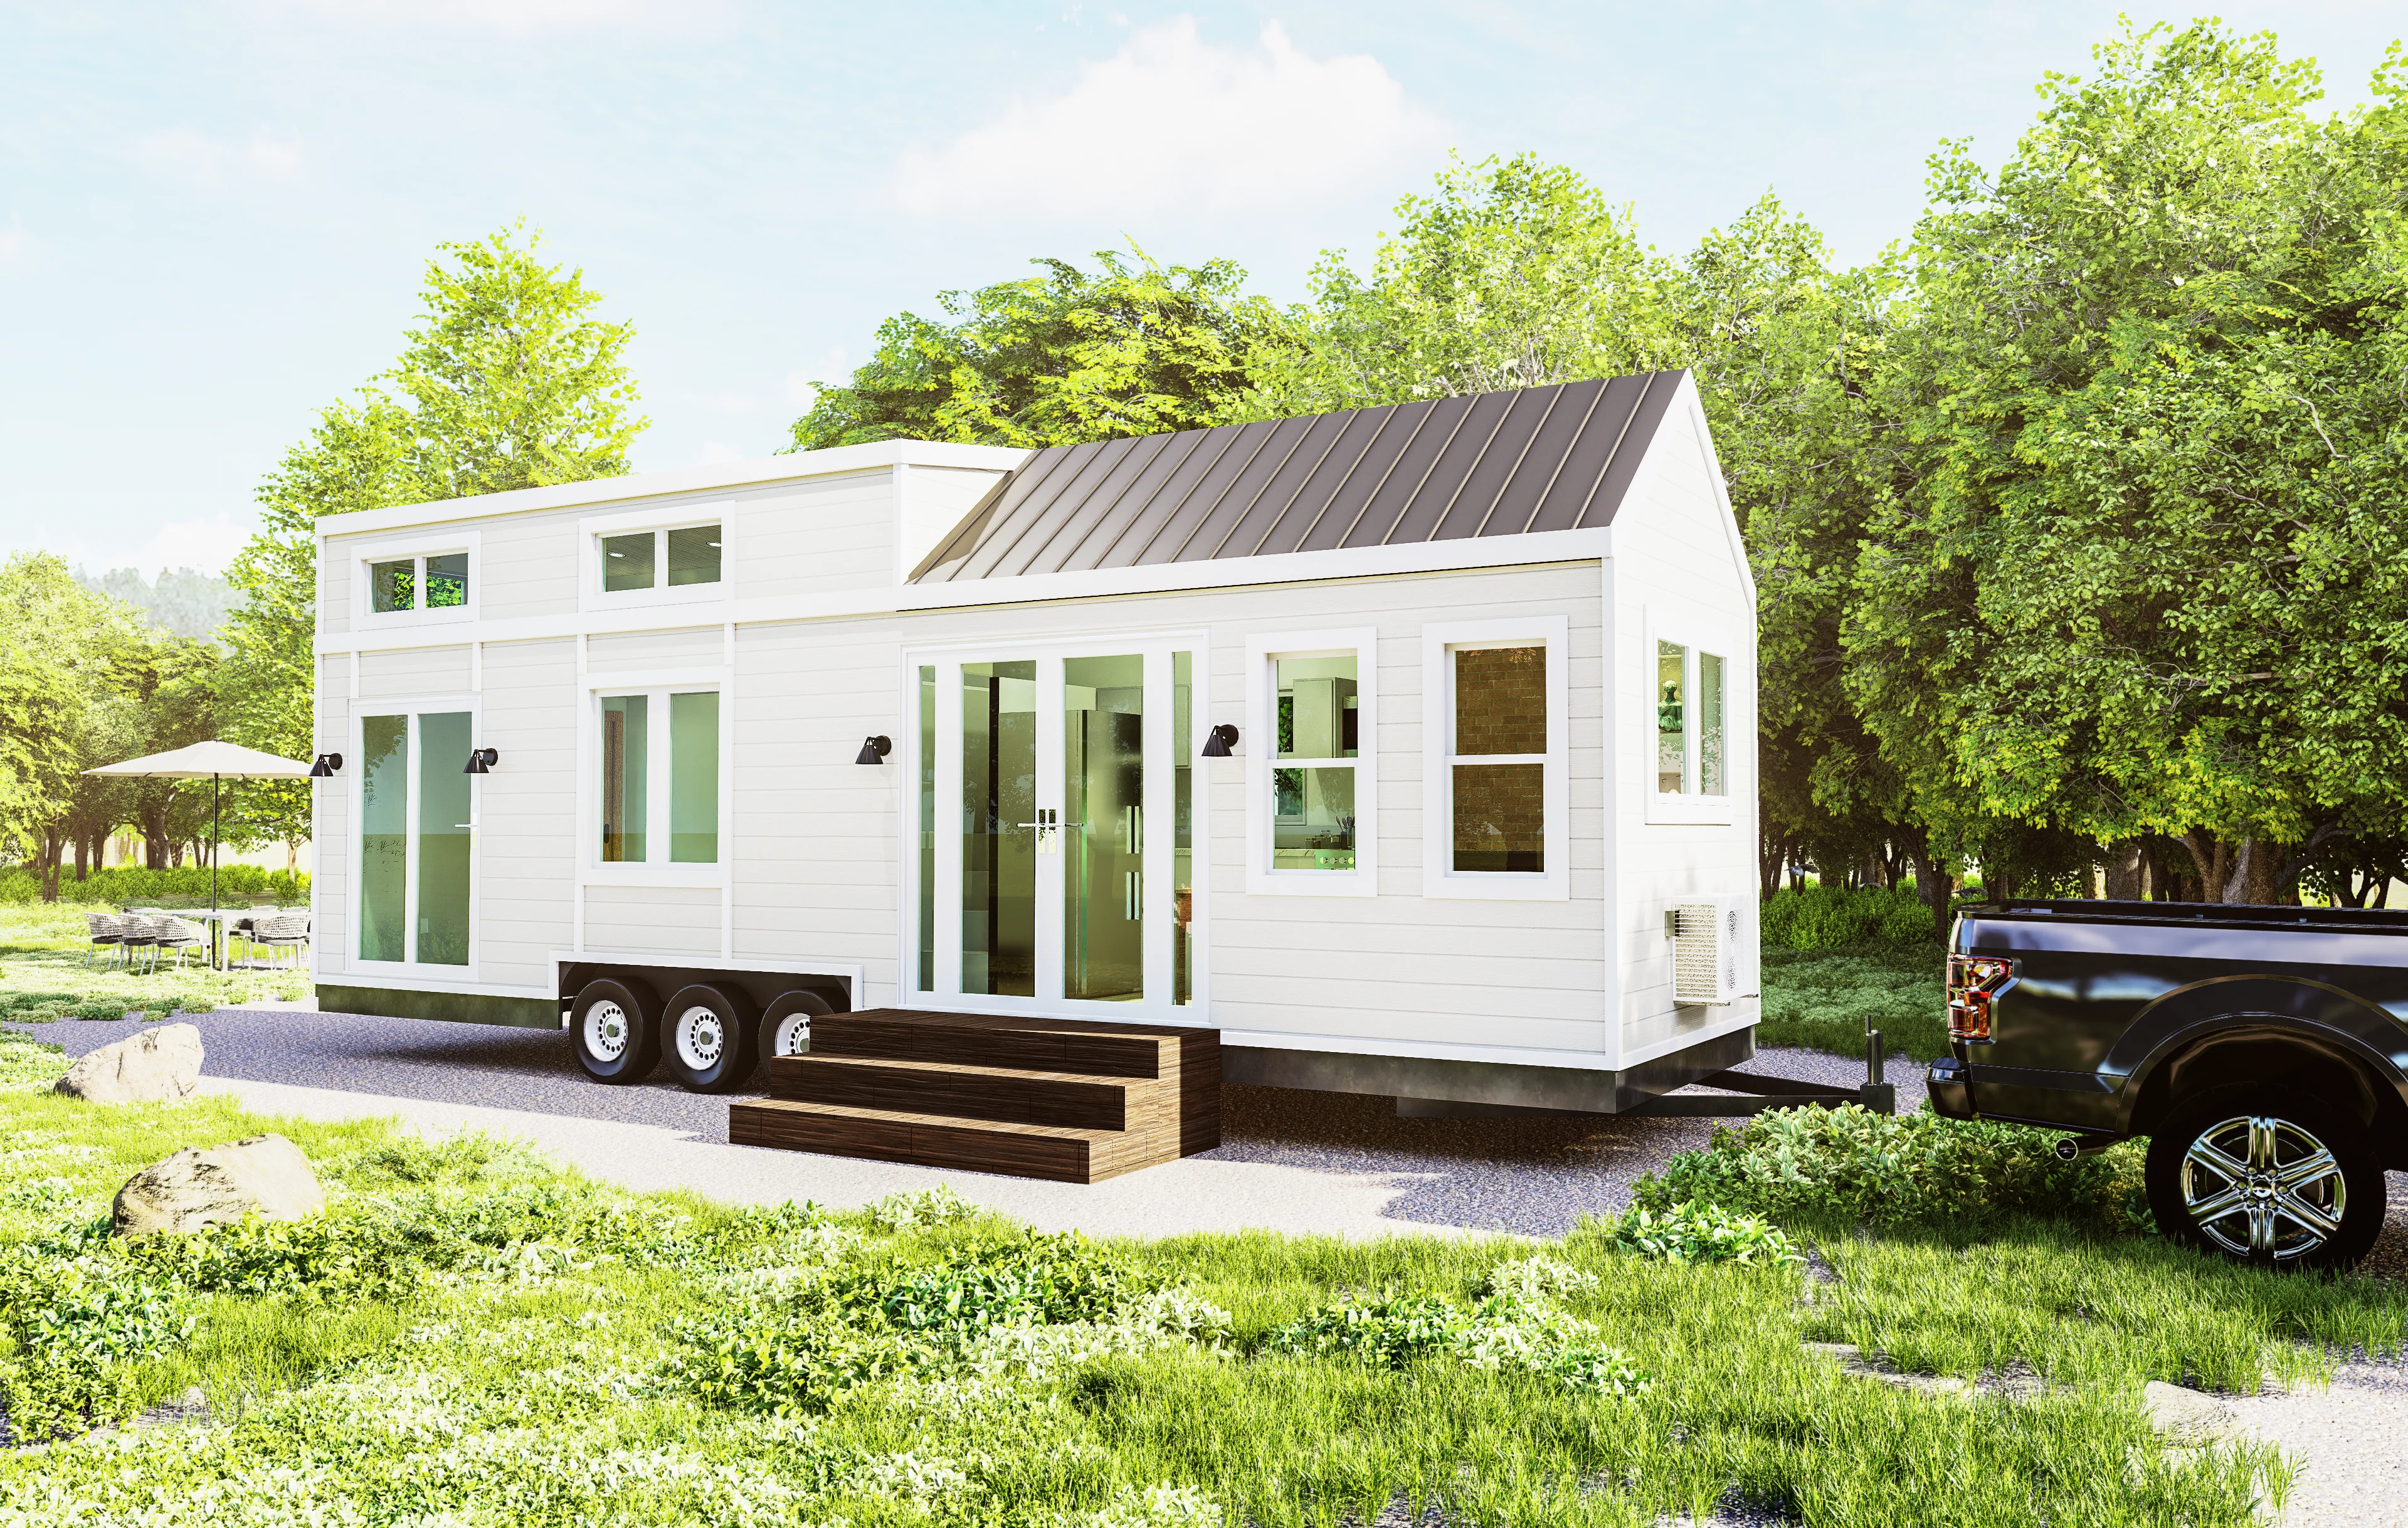
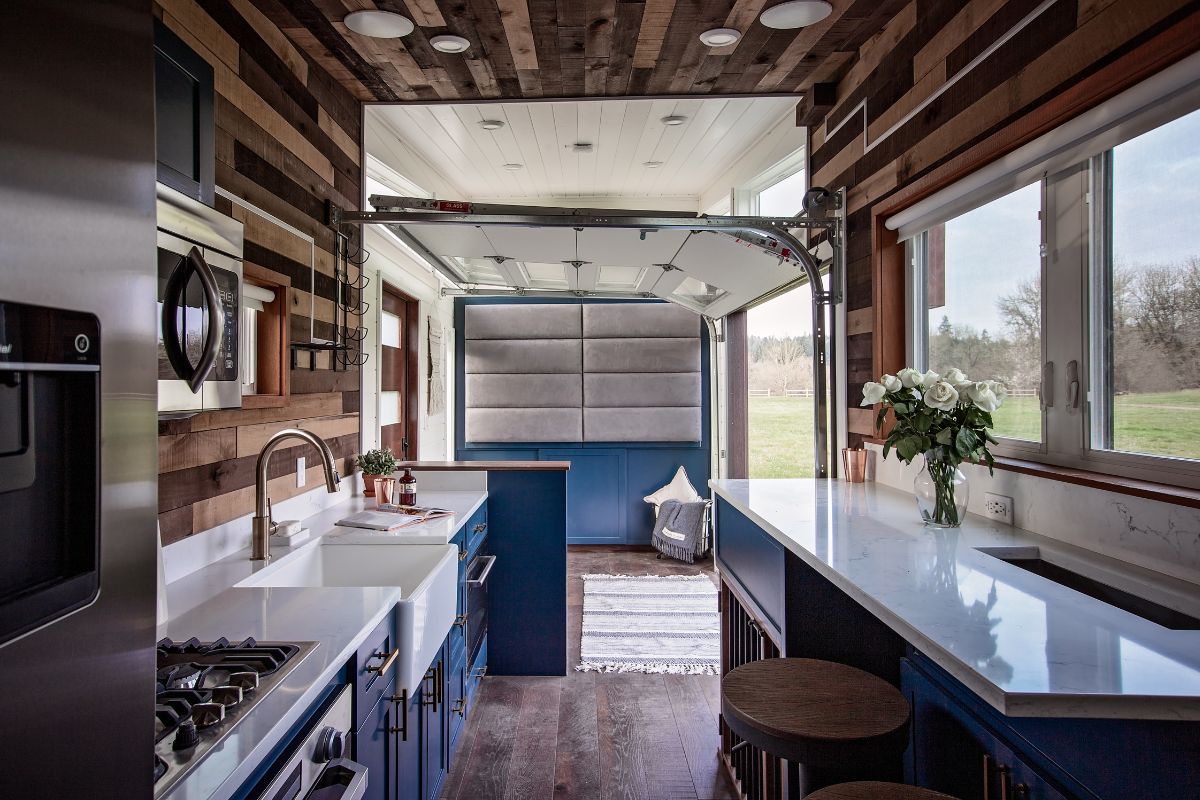
Interior Visualization: The Real Game-Changer
The exterior of a tiny home matters, but it's the interior where you'll actually live. This is where professional 3D interior design services become invaluable.
Interior visualization renders let you experiment with:
Furniture placement and scale. In a tiny home, a sofa that's 6 inches too wide can ruin an entire floor plan. Seeing it rendered to scale in 3D tells you immediately whether something works — no tape measures or cardboard cutouts required.
Storage solutions. Under-stair drawers, built-in benches with hidden compartments, murphy beds — these clever space-savers look very different in a 3D render than on a sketch. You can evaluate whether a built-in unit will feel integrated or intrusive.
Lighting design. Tiny homes often rely on layered lighting to create the illusion of more space. 3D interior renders show you how pendant lights, recessed fixtures, and LED strips will interact with your walls and surfaces — and whether your chosen fixtures suit the overall aesthetic.
Material and texture combinations. Shiplap walls with concrete countertops? Warm walnut cabinets with matte black fixtures? Interior renders let you try combinations that would be expensive to reverse in real life.
.jpg)
Real-World Tiny House Applications
Here are a few scenarios where 3D rendering makes a dramatic difference in tiny home planning:
The multi-use great room. In a tiny house, your living room is often also your dining room and home office. A 3D render helps you visualize how the space transforms throughout the day — and whether your furniture transitions work smoothly or create chaos.
The sleeping loft. Loft height is a constant debate in tiny home design. Too low and it feels like a coffin; too high and you lose precious headroom below. Renders let you test exact ceiling heights and staircase angles until everything feels right.
The bathroom. Tiny house bathrooms require surgical precision. A wet bath (where the shower, toilet, and sink share one space) can feel surprisingly generous or uncomfortably tight depending on layout. 3D visualization reveals the difference before you tile a single wall.
The kitchen galley. Counter space is precious. 3D renders help you evaluate whether your appliance lineup — mini fridge, two-burner stove, compact dishwasher — leaves enough prep room, and how it all looks against your chosen backsplash and cabinet finish.
How to Get Started
Most professional 3D visualization studios work from your architectural plans, sketches, or even rough measurements. You don't need a fully developed design — in fact, the earlier you bring in 3D rendering, the more value you get, since it's easy to iterate on a digital model but expensive to revise a half-built structure.
For tiny home projects, the typical workflow looks like this:
- Share your floor plan (even hand-drawn) with the rendering studio
- Choose style references — photos, Pinterest boards, material samples
- Review draft renders and provide feedback
- Receive final photorealistic images ready for builder communication
The result is a complete visual blueprint that you, your builder, and your contractor can all align around — reducing miscommunication and costly on-site changes.
The Bottom Line
Building a tiny home is about intentionality. Every design decision matters more than it does in a full-sized house, because there's no extra space to absorb mistakes. 3D rendering gives you the clarity and confidence to make those decisions well — to test, refine, and finalize your vision before the first board is cut.
Whether you're planning a THOW (tiny house on wheels), a backyard ADU, or a permanent off-grid retreat, investing in professional visualization upfront will save you money, reduce stress, and ensure the tiny home you build is the tiny home you actually dreamed of.
Have you used 3D visualization in your tiny home planning process? Share your experience in the comments below — we'd love to hear what worked (and what surprised you).


.jpg)