
How to Finish Newly Installed Windows

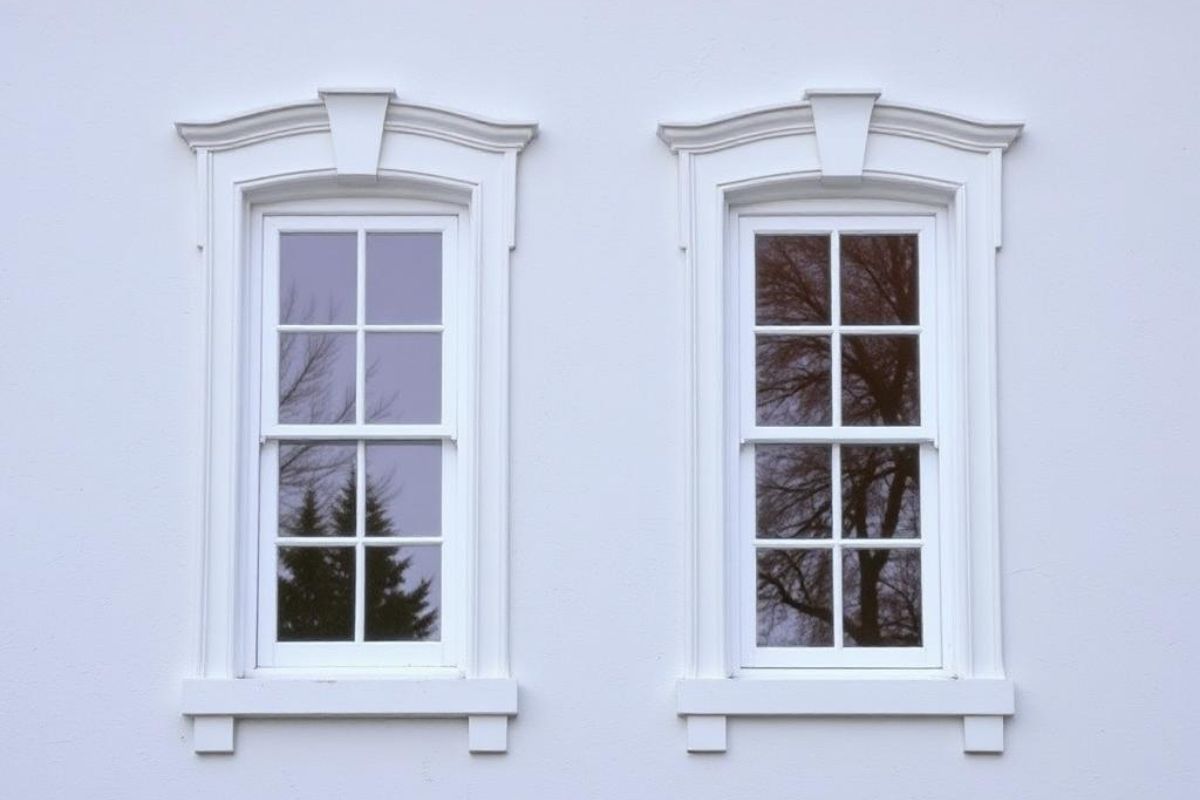
To finish newly installed windows, start by evaluating installation quality. Check for gaps, proper caulking, and smooth operation. Next, choose trim that complements your home's style—consider materials like wood or vinyl. Seal any gaps with high-quality exterior caulk or expanding foam to enhance energy efficiency. Insulate around the frames, ensuring a snug fit and adding weatherstripping for draft protection. Finally, remove any protective film, clean surfaces, caulk edges, and apply a high-quality paint for a polished look. A few finishing touches can truly elevate your installation, and there's more to explore on perfecting your window project.
- Inspect for gaps between the window frame and wall, and seal them with high-quality exterior caulk for energy efficiency.
- Ensure proper alignment by checking that windows open and close smoothly, adjusting as necessary.
- Use expanding foam insulation to fill larger gaps, trimming any excess for a clean finish.
- Apply weatherstripping to movable parts for added draft protection and insulation.
- Finish with caulking and high-quality paint, ensuring a polished appearance by touching up any missed spots.
Assessing the Installation Quality
Evaluating the installation quality of your newly installed windows is vital for guaranteeing long-term performance and energy efficiency. Start by checking for gaps between the window frame and the wall. Any noticeable gaps could lead to drafts and increased energy bills. Next, inspect the caulking around the edges; it should be smooth and even. If you notice any cracks or uneven application, it's important to reapply caulk to prevent water damage.
Make sure that the windows open and close smoothly without sticking, as this indicates proper alignment. Finally, observe the exterior; the flashing should be secure and properly installed to direct water away from the window. Taking these steps helps you maintain the integrity of your investment.
Choosing the Right Trim
Choosing the right trim for your newly installed windows can enhance both aesthetics and functionality. Start by considering the style of your home. Traditional homes often benefit from classic casing, while modern designs may call for simple, sleek lines. Next, think about the material. Wood trim adds warmth and character, while vinyl or composite options offer durability and low maintenance.
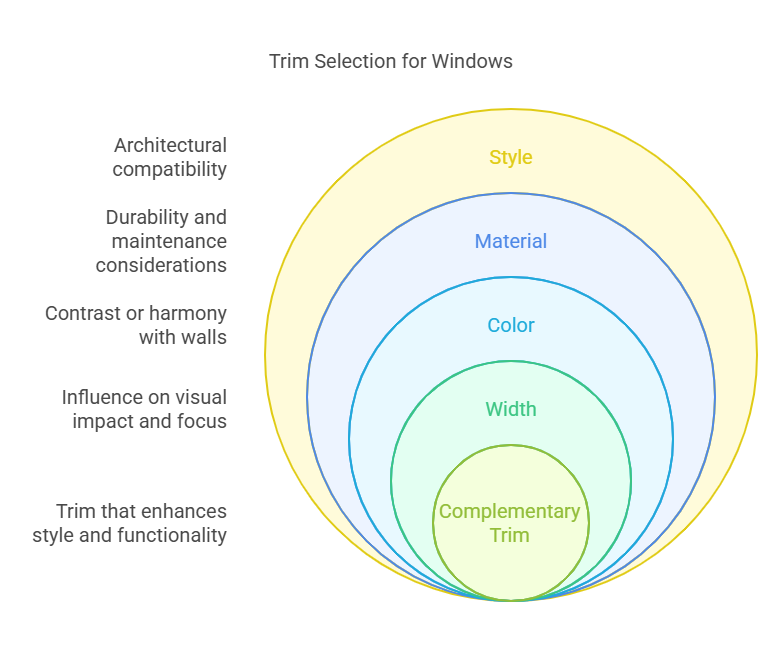
Don't forget about color. A trim that contrasts with your walls can create a striking look, whereas a matching color can provide a seamless appearance. Finally, consider the width of the trim; wider profiles can make a bold statement, while narrower options can keep the focus on the window itself. Ultimately, choose trim that complements your style and meets your practical needs.
Sealing Gaps and Cracks
While you might be excited about your newly installed windows, it is crucial to address any gaps and cracks around the frames to guarantee energy efficiency and prevent drafts. Start by inspecting the perimeter of each window for any visible spaces. Use a caulking gun to apply a high-quality exterior caulk, filling in those gaps smoothly. For larger cracks, consider using expanding foam insulation, which can expand to fill the space effectively.
.jpeg)
Be sure to clean the surfaces before applying any sealants for better adhesion. After sealing, check for any remaining gaps and touch them up as needed. This simple step not only enhances comfort in your home but also reduces energy costs long-term. Don't skip it!
Insulating Around Windows
To guarantee your newly installed windows perform their best, insulating around them is essential. Start by checking for any gaps or spaces between the window frame and the wall. Use expanding foam insulation or fiberglass batting to fill these gaps, ensuring a snug fit. If you're using foam, apply it carefully to avoid over-expansion, which can warp the frame. For a clean finish, trim any excess foam with a utility knife once it's cured.
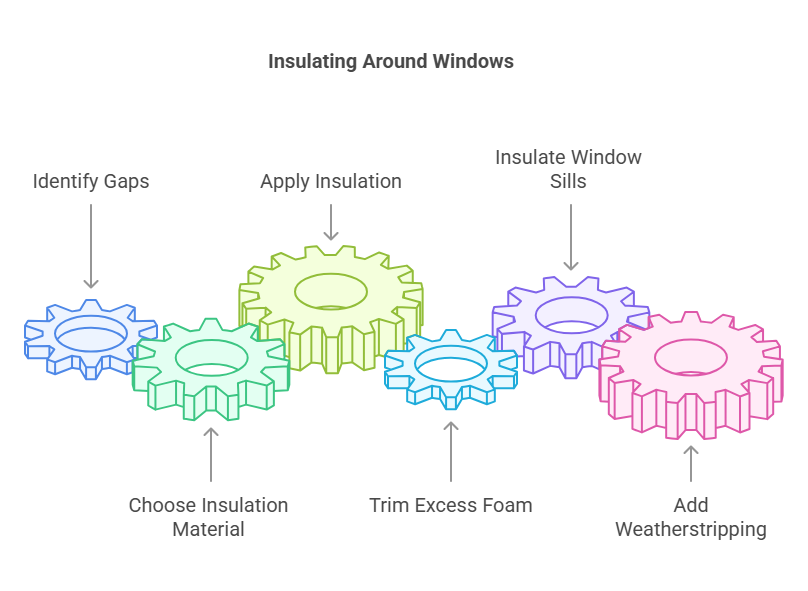
Don't forget to insulate the window sills and any other areas that might allow drafts. Finally, consider adding weatherstripping to movable parts for added protection. Proper insulation not only improves energy efficiency but also enhances your home's comfort year-round.
Final Touches and Painting
After verifying your windows are properly insulated, it's time to focus on the final touches and painting. Start by removing any protective film or tape from the window frame. Clean the surfaces thoroughly to eliminate dust and debris. Next, caulk around the edges if needed to guarantee a seamless finish. When you're ready to paint, choose a high-quality exterior or interior paint that complements your home's style.
Use a brush or roller to apply an even coat, and don't forget to paint the trim for a polished look. Allow adequate drying time between coats. Finally, inspect your work for any missed spots or imperfections, and touch them up as necessary. Your new windows will look fantastic!
Conclusion
Now that you've assessed the installation quality and chosen the right trim, it's time to seal gaps and insulate around your windows for maximum energy efficiency. Don't forget those final touches—painting and finishing details can elevate the look of your new windows. With these steps, you'll not only enhance your home's aesthetics but also improve its comfort and efficiency. Enjoy your newly finished windows and the benefits they bring!


.jpg)


.jpg)